Mortamor (デスタムーア (第一形態), Desutamūa ) Big Book of Beasts No. : #234  | |||||||||||||||||||||||||||||||||||||||||||||||||||||||
| |||||||||||||||||||||||||||||||||||||||||||||||||||||||
| |||||||||||||||||||||||||||||||||||||||||||||||||||||||
Mortamor: Difference between revisions
Jump to navigation
Jump to search
No edit summary |
|||
| Line 2: | Line 2: | ||
|Name=Mortamor | |Name=Mortamor | ||
|Game={{Dragon Quest VI}} | |Game={{Dragon Quest VI}} | ||
|Image=[[Image:Mortamor_Art.png|center| | |Image=[[Image:Mortamor_Art.png|center|250px]] | ||
|Sprite= | |Sprite= | ||
|Japanese name=デスタムーア | |Japanese name=デスタムーア | ||
|Roumaji=Desutamuua | |Roumaji=Desutamuua | ||
|Old=Deathtamoor | |Old=Deathtamoor | ||
|Title={{tt|Archfiend|大魔王, ''Daimaō''}}<br>{{tt|King of the Dread Realm|狭間の王, ''Hazama no Ō''}} ( | |Title={{tt|Archfiend|大魔王, ''Daimaō''}}<br>{{tt|King of the Dread Realm|狭間の王, ''Hazama no Ō''}} ({{Rivals}}/{{Super Light}})<br>{{tt|Old King|老王, ''Rō Ō''}}<br>{{tt|King of Wrath|憤怒の王, ''Fundo no Ō''}}<br>{{tt|King of Dreams|夢幻の王, ''Mugen no Ō''}} | ||
|Class= | |Class= | ||
|Race= | |Race= | ||
| Line 22: | Line 22: | ||
When first confronted, Mortamor appears to be an old demon with gold orbs levitating before each of his hands. Mortamor himself states that this is merely a facade and will, upon first defeat, emerge from the two fused golden orbs as a hulking, winged demon with spiked shoulders. When this form is defeated Mortamor will literally cast aside his body, becoming the disembodied demonic face and pair of hands he is best known as. | When first confronted, Mortamor appears to be an old demon with gold orbs levitating before each of his hands. Mortamor himself states that this is merely a facade and will, upon first defeat, emerge from the two fused golden orbs as a hulking, winged demon with spiked shoulders. When this form is defeated Mortamor will literally cast aside his body, becoming the disembodied demonic face and pair of hands he is best known as. | ||
Mortamor is similar to [[Zoma]] in that he influences the world through proxies, preferring to revel in the suffering of the humans trapped in his living nightmare than do his own dirty work. Mortamor's plans are more precise than his [[Erdrick trilogy]] counterpart, however; rather than sending one lieutenant to cause undirected chaos, Mortamor uses four agents to target specific bastions of the mortal realm that would inhibit his conquest. By sealing away {{Alltrades Abbey 6}}, [[Medal king|Medford's manor]], [[Sorceria]], and [[Cloudsgate Citadel]], Mortamor displays a keen understanding of the capabilities of | Mortamor is similar to [[Zoma]] in that he influences the world through proxies, preferring to revel in the suffering of the humans trapped in his living nightmare than do his own dirty work. Mortamor's plans are more precise than his [[Erdrick trilogy]] counterpart, however; rather than sending one lieutenant to cause undirected chaos, Mortamor uses four agents to target specific bastions of the mortal realm that would inhibit his conquest. By sealing away {{Alltrades Abbey 6}}, [[Medal king|Medford's manor]], [[Sorceria]], and [[Cloudsgate Citadel]], Mortamor displays a keen understanding of the capabilities of [[human]]s and their potential to overthrow him should he attack directly. | ||
Personality-wise, Mortamor is extremely arrogant, condescending and egotistical, even in comparison to the other Demon Lords of the franchise. He does not view the heroes as threats whatsoever, even after they overcame his numerous assets. Even upon defeat, Mortamor remains in denial of the heroes' powers up to his last breath. When confronted by [[Nokturnus]], Mortamor drops his narcissistic persona and expresses fear of being challenged by a stronger being but recklessly engages him in combat nevertheless. | Personality-wise, Mortamor is extremely arrogant, condescending and egotistical, even in comparison to the other Demon Lords of the franchise. He does not view the heroes as threats whatsoever, even after they overcame his numerous assets. Even upon defeat, Mortamor remains in denial of the heroes' powers up to his last breath. When confronted by [[Nokturnus]], Mortamor drops his narcissistic persona and expresses fear of being challenged by a stronger being but recklessly engages him in combat nevertheless. | ||
| Line 44: | Line 44: | ||
|bestiaryNumber=#234 | |bestiaryNumber=#234 | ||
|spells=[[Kaboom]]<br>[[Bounce]] | |spells=[[Kaboom]]<br>[[Bounce]] | ||
|skills=Occasionally acts twice per round<br>[[Disruptive Wave]]<br>Fires off a ball of frigid ice (124~134 ice breath damage to entire | |skills=Occasionally acts twice per round.<br>[[Disruptive Wave]]<br>Fires off a ball of frigid ice. (124~134 ice breath damage to entire {{Party 6}}.)<br>[[Meditation]]<br>[[Incantation|Energy Balls]] (attack/2 +67, attacks twice)<br>Cackles insanely and launches an attack. (125% damage)<br>Throws a ball of searing flame. (168~188 fire breath damage to entire {{Party 6}}.)<br>[[Venom Mist]] | ||
|locations=[[Mortamor's Dreadlair]] | |locations=[[Mortamor's Dreadlair]] | ||
|items=None | |items=None | ||
| Line 72: | Line 72: | ||
|remake-sprites=[[Image:Mortamor DQVI DS.png]] | |remake-sprites=[[Image:Mortamor DQVI DS.png]] | ||
}} | }} | ||
In his initial form, he appears as demonic old man with golden orbs. Using the orbs, he can roast the | In his initial form, he appears as demonic old man with golden orbs. Using the orbs, he can roast the {{Party 6}} with searing flames (168~188) or lacerate them with frigid ice (124~134), both of which ignore [[Insulatle]] and can only be reduced by armour resistances or defending. His attack while he is cackling insanely increases his strike's power by 25%, and damage dealt with the energy orbs adds +67 to each strike. The orb can potentially strike a single character twice and the added damage cannot be reduced, even with defence. | ||
|Second phase| | |Second phase| | ||
{{DQ6Enemy | {{DQ6Enemy | ||
| Line 89: | Line 89: | ||
|bestiaryNumber=#235 | |bestiaryNumber=#235 | ||
|spells=[[Buff]]<br>[[Oomph]]<br>[[Kasap]] | |spells=[[Buff]]<br>[[Oomph]]<br>[[Kasap]] | ||
|skills=Occasionally acts twice per turn<br>Charges towards character (150~180 damage)<br>[[Mercurial Thrust]]<br>[[Defending Champion]]<br>[[Roundhouse Kick]]<br>[[Scorch]] | |skills=Occasionally acts twice per turn.<br>Charges towards character. (150~180 damage)<br>[[Mercurial Thrust]]<br>[[Defending Champion]]<br>[[Roundhouse Kick]]<br>[[Scorch]] | ||
|locations=[[Mortamor's Dreadlair]] | |locations=[[Mortamor's Dreadlair]] | ||
|items=None | |items=None | ||
| Line 117: | Line 117: | ||
|remake-sprites=[[Image:Mortamor2 DQVI DS.png]] | |remake-sprites=[[Image:Mortamor2 DQVI DS.png]] | ||
}} | }} | ||
In this form, Mortamor transforms into a large, hulking demon. He relies mainly on hard-hitting physical attacks, sometimes augmenting himself with Oomph and Buff. When he charges a character, his spiked shoulders will deal 150~180 damage ignoring | In this form, Mortamor transforms into a large, hulking [[demon]]. He relies mainly on hard-hitting physical attacks, sometimes augmenting himself with [[Oomph]] and [[Buff]]. When he charges a character, his spiked shoulders will deal 150~180 damage ignoring {{Defense}}. He is still immune to status ailments, but his elemental resistances have fallen. After defeating this phase, Mortamor discards this body and emerges in his iconic form. | ||
|Third phase| | |Third phase| | ||
{{DQ6Enemy | {{DQ6Enemy | ||
| Line 134: | Line 134: | ||
|bestiaryNumber=#236 | |bestiaryNumber=#236 | ||
|spells=[[Kaboom]]<br>[[Kafrizzle]]<br>[[Magic Burst]] | |spells=[[Kaboom]]<br>[[Kafrizzle]]<br>[[Magic Burst]] | ||
|skills=Occasionally acts twice per turn<br>[[Disruptive Wave]]<br>[[Ferocious Roar]](120~150 damage to entire | |skills=Occasionally acts twice per turn.<br>[[Disruptive Wave]]<br>[[Ferocious Roar]](120~150 damage to entire {{Party 6}})<br>[[Freezing Blizzard]]<br>[[Lullab-Eye]]<br>[[Pyre o' Fire]]<br>[[Evil Prayer]] | ||
|locations=[[Mortamor's Dreadlair]] | |locations=[[Mortamor's Dreadlair]] | ||
|items=None | |items=None | ||
| Line 163: | Line 163: | ||
At this point, Mortamor appears as a disembodied head and two claws. The claws are independent targets that act on their own, and can revive other parts as needed. In order to restore peace to the world, '''all''' parts of Mortamor must be destroyed. | At this point, Mortamor appears as a disembodied head and two claws. The claws are independent targets that act on their own, and can revive other parts as needed. In order to restore peace to the world, '''all''' parts of Mortamor must be destroyed. | ||
The head is very resistant to elemental damage, with all but [[Frizz]] and [[Zap]] dealing 40%. It can fight defensively with Lullab-Eye to send a character to slumber regardless of [[Snooze]] resistance, or go on the offensive with defence-ignoring skills like Pyre o' Fire and Ferocious Roar (120~150). Once the head drops to half health, it will hit the party with [[Magic Burst]] for 200~220 damage, and follow up with a meditation that completely restores his {{MP}}. The head is also classified as a [[Undead family|Zombie]]-family | The head is very resistant to elemental damage, with all but [[Frizz]] and [[Zap]] dealing 40%. It can fight defensively with [[Lullab-Eye]] to send a character to slumber regardless of [[Snooze]] resistance, or go on the offensive with defence-ignoring skills like [[Pyre o' Fire]] and Ferocious Roar (120~150). Once the head drops to half health, it will hit the party with [[Magic Burst]] for 200~220 damage, and follow up with a meditation that completely restores his {{MP}}. The head is also classified as a [[Undead family|Zombie]]-family {{MFamilies}}; exploit this weakness with [[Undead Undoer]] and [[Pearly Gates]]. | ||
|Right claw| | |Right claw| | ||
{{DQ6Enemy | {{DQ6Enemy | ||
| Line 207: | Line 207: | ||
|army-resist=100% | |army-resist=100% | ||
}} | }} | ||
Mortamor's right claw appears with his third form. It's much slower than the other two parts, but has the ability to heal the others. The claw is less resistant to elements, taking full damage from everything but fire, wind, and ice. Talon Slam will deal +150 more damage than a normal strike, and Powerful Thrust works the same as [[Knuckle Sandwich]]. | Mortamor's right claw appears with his third form. It's much slower than the other two parts, but has the ability to heal the others. The claw is less resistant to elements, taking full damage from everything but fire, wind, and ice. [[Throwdown|Talon Slam]] will deal +150 more damage than a normal strike, and Powerful Thrust works the same as [[Knuckle Sandwich]]. | ||
|Left claw| | |Left claw| | ||
{{DQ6Enemy | {{DQ6Enemy | ||
| Line 251: | Line 251: | ||
|army-resist=100% | |army-resist=100% | ||
}} | }} | ||
Mortamor's left claw appears with his third form. It's much faster than the other two parts, and can revive them with Kazing if it isn't removed first. Claw Slash will deal 25% more damage than normal. This hand is the most resistant to elements, taking full damage only from [[Zap]]. | Mortamor's left claw appears with his third form. It's much faster than the other two parts, and can revive them with [[Kazing]] if it isn't removed first. [[Claw Slash]] will deal 25% more damage than normal. This hand is the most resistant to elements, taking full damage only from [[Zap]]. | ||
}} | }} | ||
| Line 273: | Line 273: | ||
|locations={{Grotto}} | |locations={{Grotto}} | ||
|bestiaryNumber=303 | |bestiaryNumber=303 | ||
|description="Stares enemies into a slumber, then clobbers them with a Kafrizz and Kafrizzle. Can be damaged with darkness. | |description="Stares enemies into a slumber, then clobbers them with a [[Kafrizz]] and [[Kafrizzle]]. Can be damaged with darkness. | ||
Assesses opponents' strength, then assumes a disguise to suit the situation. No one knows what he really looks like..." | Assesses opponents' strength, then assumes a disguise to suit the situation. No one knows what he really looks like..." | ||
|fire = 100 | |fire = 100 | ||
| Line 292: | Line 292: | ||
}} | }} | ||
Moratamor appears as a Legacy Boss, obtained after completing [[List of quests in Dragon Quest IX#Quest #151 - #152|Quest #158]] (or received at special events). He will become [[enraged]] once his health drops to orange range. Mortamor is unique among bosses in that he is accompanied by two enemies that are not found anywhere else, unlike [[Hootingham-Gore]] and [[Shogum]], who are accompanied by common | Moratamor appears as a Legacy Boss, obtained after completing [[List of quests in Dragon Quest IX#Quest #151 - #152|Quest #158]] (or received at special events). He will become [[enraged]] once his health drops to orange range. Mortamor is unique among bosses in that he is accompanied by two enemies that are not found anywhere else, unlike [[Hootingham-Gore]] and [[Shogum]], who are accompanied by common {{MFamilies}}s. He is also unique among Legacy Bosses in that he is the only one who attacks a single time per turn (but the accompanying claws equate to one or two extra actions, depending on whether one or both are present). | ||
{| border="0" cellpadding="5" cellspacing="0" width="100%" | {| border="0" cellpadding="5" cellspacing="0" width="100%" | ||
| Line 340: | Line 340: | ||
|8||[[C-c-cold Breath]] | |8||[[C-c-cold Breath]] | ||
|- | |- | ||
|16||[[Kafrizzle]], stops using Kafrizz & Kaswoosh | |16||[[Kafrizzle]], stops using [[Kafrizz]] & [[Kaswoosh]] | ||
|- | |- | ||
|28||[[Hellfire]] | |28||[[Hellfire]] | ||
|- | |- | ||
|41||[[Kaswooshle]], stops using Scorch | |41||[[Kaswooshle]], stops using [[Scorch]] | ||
|- | |- | ||
|57||[[Magic Burst]], [[Evil Prayer]] | |57||[[Magic Burst]], [[Evil Prayer]] | ||
| Line 363: | Line 363: | ||
|wisdom=5/5 | |wisdom=5/5 | ||
|agility=5/5 | |agility=5/5 | ||
|family= | |family= {{Q family}} | ||
|in-game-description= An evil lord that lives in reality and fantasy | |in-game-description= An evil lord that lives in reality and fantasy | ||
|abilities=[[TatsuCall]], [[Lightning Storm|HellBlast]], [[Big Banga|BigBang]] | |abilities=[[TatsuCall]], [[Lightning Storm|HellBlast]], [[Big Banga|BigBang]] | ||
| Line 409: | Line 409: | ||
|wisdom=5/5 | |wisdom=5/5 | ||
|agility=5/5 | |agility=5/5 | ||
|family= | |family= {{Q family}} | ||
|in-game-description=Shed off its disguise to show off its strength. | |in-game-description=Shed off its disguise to show off its strength. | ||
|abilities=[[Fire Breath|FireAir]], [[Body Slam|Ramming]], [[Wave of Panic|UltraDown]] | |abilities=[[Fire Breath|FireAir]], [[Body Slam|Ramming]], [[Wave of Panic|UltraDown]] | ||
| Line 455: | Line 455: | ||
|wisdom=5/5 | |wisdom=5/5 | ||
|agility=5/5 | |agility=5/5 | ||
|family= | |family= {{Q family}} | ||
|in-game-description=Only a true warrior can reveal its real identity. | |in-game-description=Only a true warrior can reveal its real identity. | ||
|abilities=[[Focus Pocus|Focus]], [[Disruptive Wave|DeMagic]], [[Big Banga|BigBang]] | |abilities=[[Focus Pocus|Focus]], [[Disruptive Wave|DeMagic]], [[Big Banga|BigBang]] | ||
| Line 488: | Line 488: | ||
|curse-resist=Immune | |curse-resist=Immune | ||
}} | }} | ||
DeathMore is present in all of his forms from {{ | DeathMore is present in all of his forms from {{VI}}, though his hands are part of his final form now and not separate {{MFamilies}}s. The player will have to obtain nearly all other members of the boss family to breed all of his forms. He is also the boss of [[List of teleportals in Dragon Quest Monsters|Old Man's Gate]] and is considered by the residents of [[GreatTree]] to be the strongest of the evil lords. | ||
==={{DQM2}}=== | ==={{DQM2}}=== | ||
| Line 503: | Line 503: | ||
|wisdom=7/10 | |wisdom=7/10 | ||
|agility=7/10 | |agility=7/10 | ||
|family= | |family= {{Q family}} | ||
|in-game-description= | |in-game-description= | ||
|abilities=[[Big Banga|BigBang]], [[Lightning Storm|HellBlast]], [[TatsuCall]] | |abilities=[[Big Banga|BigBang]], [[Lightning Storm|HellBlast]], [[TatsuCall]] | ||
| Line 549: | Line 549: | ||
|wisdom=7/10 | |wisdom=7/10 | ||
|agility=7/10 | |agility=7/10 | ||
|family= | |family= {{Q family}} | ||
|in-game-description= | |in-game-description= | ||
|abilities=[[Fire Breath|FireAir]], [[Body Slam|Ramming]], [[Wave of Panic|UltraDown]] | |abilities=[[Fire Breath|FireAir]], [[Body Slam|Ramming]], [[Wave of Panic|UltraDown]] | ||
| Line 595: | Line 595: | ||
|wisdom=7/10 | |wisdom=7/10 | ||
|agility=7/10 | |agility=7/10 | ||
|family= | |family= {{Q family}} | ||
|in-game-description= | |in-game-description= | ||
|abilities=[[Big Banga|BigBang]], [[Disruptive Wave|DeMagic]], | |abilities=[[Big Banga|BigBang]], [[Disruptive Wave|DeMagic]], [[Focus Pocus|Focus]] | ||
|habitat= | |habitat= | ||
|breeding=DeathMore (Transformed) x [[DarkMate]], [[Murdaw|Mudou]], [[Poseidon]] | |breeding=DeathMore (Transformed) x [[DarkMate]], [[Murdaw|Mudou]], [[Poseidon]] | ||
Revision as of 14:11, 7 January 2024
| Mortamor | |
| Dragon Quest VI | |
 | |
| Japanese name | デスタムーア |
| Romaji | Desutamuua |
| Old localisation | Deathtamoor |
| Title | Archfiend King of the Dread Realm (Rivals/Super Light) Old King King of Wrath King of Dreams |
| Age | Unknown |
| Voice actor | Kenichi Ogata (Japanese, CD Theater) |
Mortamor is a character and recurring monster in the Dragon Quest series that appears as the main antagonist and final boss of Dragon Quest VI.
He is the mysterious Archfiend who sent Murdaw, Jamirus, Gracos, and Dhuran to conquer the Lower World and the Upper World. He lurks in his dreadlair seated at the far reaches of a hellish dimension known as the Dread Realm.
Characteristics
When first confronted, Mortamor appears to be an old demon with gold orbs levitating before each of his hands. Mortamor himself states that this is merely a facade and will, upon first defeat, emerge from the two fused golden orbs as a hulking, winged demon with spiked shoulders. When this form is defeated Mortamor will literally cast aside his body, becoming the disembodied demonic face and pair of hands he is best known as.
Mortamor is similar to Zoma in that he influences the world through proxies, preferring to revel in the suffering of the humans trapped in his living nightmare than do his own dirty work. Mortamor's plans are more precise than his Erdrick trilogy counterpart, however; rather than sending one lieutenant to cause undirected chaos, Mortamor uses four agents to target specific bastions of the mortal realm that would inhibit his conquest. By sealing away Alltrades Abbey, Medford's manor, Sorceria, and Cloudsgate Citadel, Mortamor displays a keen understanding of the capabilities of humans and their potential to overthrow him should he attack directly.
Personality-wise, Mortamor is extremely arrogant, condescending and egotistical, even in comparison to the other Demon Lords of the franchise. He does not view the heroes as threats whatsoever, even after they overcame his numerous assets. Even upon defeat, Mortamor remains in denial of the heroes' powers up to his last breath. When confronted by Nokturnus, Mortamor drops his narcissistic persona and expresses fear of being challenged by a stronger being but recklessly engages him in combat nevertheless.
Appearances
Dragon Quest VI: Realms of Revelation


Mortamor (デスタムーア (第二形態), Desutamūa ) Big Book of Beasts No. : #235 | |||||||||||||||||||||||||||||||||||||||||||||||||||||||
| |||||||||||||||||||||||||||||||||||||||||||||||||||||||
| |||||||||||||||||||||||||||||||||||||||||||||||||||||||
| |||||||||||||||||||||||||||||||||||||||||||||||||||||||

Mortamor (デスタムーア (第三形態), Desutamūa ) Big Book of Beasts No. : #236 | |||||||||||||||||||||||||||||||||||||||||||||||||||||||
| |||||||||||||||||||||||||||||||||||||||||||||||||||||||
| |||||||||||||||||||||||||||||||||||||||||||||||||||||||
| |||||||||||||||||||||||||||||||||||||||||||||||||||||||

At this point, Mortamor appears as a disembodied head and two claws. The claws are independent targets that act on their own, and can revive other parts as needed. In order to restore peace to the world, all parts of Mortamor must be destroyed.
The head is very resistant to elemental damage, with all but Frizz and Zap dealing 40%. It can fight defensively with Lullab-Eye to send a character to slumber regardless of Snooze resistance, or go on the offensive with defence-ignoring skills like Pyre o' Fire and Ferocious Roar (120~150). Once the head drops to half health, it will hit the party with Magic Burst for 200~220 damage, and follow up with a meditation that completely restores his MP. The head is also classified as a Zombie-family monster; exploit this weakness with Undead Undoer and Pearly Gates.Right claw (みぎて, Migite ) | |||||||||||||||||||||||||||||||||||||||||||||||||||||||
| |||||||||||||||||||||||||||||||||||||||||||||||||||||||
| |||||||||||||||||||||||||||||||||||||||||||||||||||||||
| |||||||||||||||||||||||||||||||||||||||||||||||||||||||
Left claw (ひだりて, Hidarite ) | |||||||||||||||||||||||||||||||||||||||||||||||||||||||
| |||||||||||||||||||||||||||||||||||||||||||||||||||||||
| |||||||||||||||||||||||||||||||||||||||||||||||||||||||
| |||||||||||||||||||||||||||||||||||||||||||||||||||||||
Dragon Quest IX: Sentinels of the Starry Skies
| #303 - Mortamor | |||||||||||||||||||||||||||||||||||||||||||
|---|---|---|---|---|---|---|---|---|---|---|---|---|---|---|---|---|---|---|---|---|---|---|---|---|---|---|---|---|---|---|---|---|---|---|---|---|---|---|---|---|---|---|---|

| |||||||||||||||||||||||||||||||||||||||||||
| |||||||||||||||||||||||||||||||||||||||||||
| Dropped Item | |||||||||||||||||||||||||||||||||||||||||||
| Locations | Grotto | ||||||||||||||||||||||||||||||||||||||||||
| Family | |||||||||||||||||||||||||||||||||||||||||||
| Capture Rate | |||||||||||||||||||||||||||||||||||||||||||
| Bestiary # | 303 | ||||||||||||||||||||||||||||||||||||||||||
| Game | Dragon Quest IX | ||||||||||||||||||||||||||||||||||||||||||
| Console | DS | ||||||||||||||||||||||||||||||||||||||||||
| Japanese Name | デスタムーア | ||||||||||||||||||||||||||||||||||||||||||
| Romanized Jap. | Desutamūa | ||||||||||||||||||||||||||||||||||||||||||
| Description | "Stares enemies into a slumber, then clobbers them with a Kafrizz and Kafrizzle. Can be damaged with darkness.
Assesses opponents' strength, then assumes a disguise to suit the situation. No one knows what he really looks like..." | ||||||||||||||||||||||||||||||||||||||||||
| Additional Attributes | ||||||
|---|---|---|---|---|---|---|
| Fire | Ice | Wind | Earth | Light | Dark | |
| 100 | 50 | 100 | 100 | 100 | 150 | |
| Blast | Dazzle | Sleep | Death | Drain MP | Confusion | |
| 100 | 0 | 0 | 0 | 100 | 0 | |
| Fizzle | Inaction | Paralyze | Poison | Charm | Magic Res | |
| 0 | 0 | 0 | 0 | 5 | 25 | |
| Blunt | Sap | Decelerate | ||||
| 5 | 25 | 75 | ||||
Moratamor appears as a Legacy Boss, obtained after completing Quest #158 (or received at special events). He will become enraged once his health drops to orange range. Mortamor is unique among bosses in that he is accompanied by two enemies that are not found anywhere else, unlike Hootingham-Gore and Shogum, who are accompanied by common monsters. He is also unique among Legacy Bosses in that he is the only one who attacks a single time per turn (but the accompanying claws equate to one or two extra actions, depending on whether one or both are present).
Treasure
|
Skills
|
Dragon Quest Monsters
DeathMore

| Sprite | Level cap * | HP growth | MP growth |
 |
60 | 3/5 | 5/5 |
| Strength growth | Resilience growth | Wisdom growth | Agility growth |
| 5/5 | 2/5 | 5/5 | 5/5 |
| Family | ??? |
| In-game description | An evil lord that lives in reality and fantasy |
| Abilities | TatsuCall, HellBlast, BigBang |
| Habitat | Old Man's Gate |
| Breeding chart | Zoma x Mirudraas (Either form) |
| Frizz Resistance * | Sizz Resistance * | Fire Breath Resistance * | Bang Resistance * |
| Weak | Strong | Weak | Strong |
| Crack Resistance * | Ice Breath Resistance * | Woosh Resistance * | Rock/Army Resistance * |
| Strong | Strong | Weak | Weak |
| Zap Resistance * | Gigaslash Resistance | Magic Burst Resistance | Drain Magic Resistance * |
| Weak | None | Weak | Strong |
| Whack Resistance * | Kamikazee Resistance * | Poison Resistance * | Paralysis Resistance * |
| Immune | Immune | Immune | Strong |
| Fuddle Resistance * | Snooze Resistance * | Dazzle Resistance * | Fizzle Resistance |
| Immune | Immune | Immune | Immune |
| Ban Dance Resistance | Gobstopper Resistance | Stun Resistance * | Sap Resistance * |
| Immune | Immune | Immune | Immune |
| Decelerate Resistance * | Curse Resistance | ||
| Immune | Immune | ||
DeathMore (Transformed)
| Sprite | Level cap * | HP growth | MP growth |
 |
70 | 3/5 | 5/5 |
| Strength growth | Resilience growth | Wisdom growth | Agility growth |
| 5/5 | 2/5 | 5/5 | 5/5 |
| Family | ??? |
| In-game description | Shed off its disguise to show off its strength. |
| Abilities | FireAir, Ramming, UltraDown |
| Habitat | Only obtainable through breeding |
| Breeding chart | DeathMore x Armorpion |
| Frizz Resistance * | Sizz Resistance * | Fire Breath Resistance * | Bang Resistance * |
| Strong | Strong | Weak | Strong |
| Crack Resistance * | Ice Breath Resistance * | Woosh Resistance * | Rock/Army Resistance * |
| Strong | Strong | Strong | Strong |
| Zap Resistance * | Gigaslash Resistance | Magic Burst Resistance | Drain Magic Resistance * |
| Weak | Weak | Weak | Immune |
| Whack Resistance * | Kamikazee Resistance * | Poison Resistance * | Paralysis Resistance * |
| Immune | Immune | Immune | Strong |
| Fuddle Resistance * | Snooze Resistance * | Dazzle Resistance * | Fizzle Resistance |
| Immune | Immune | Immune | Immune |
| Ban Dance Resistance | Gobstopper Resistance | Stun Resistance * | Sap Resistance * |
| Immune | Immune | Immune | Strong |
| Decelerate Resistance * | Curse Resistance | ||
| Strong | Immune | ||
DeathMore (Final form)
| Sprite | Level cap * | HP growth | MP growth |
 |
80 | 3/5 | 5/5 |
| Strength growth | Resilience growth | Wisdom growth | Agility growth |
| 5/5 | 3/5 | 5/5 | 5/5 |
| Family | ??? |
| In-game description | Only a true warrior can reveal its real identity. |
| Abilities | Focus, DeMagic, BigBang |
| Habitat | Only obtainable through breeding |
| Breeding chart | DeathMore (Transformed) x Mudou |
| Frizz Resistance * | Sizz Resistance * | Fire Breath Resistance * | Bang Resistance * |
| Immune | Immune | Strong | Immune |
| Crack Resistance * | Ice Breath Resistance * | Woosh Resistance * | Rock/Army Resistance * |
| Immune | Immune | Immune | Immune |
| Zap Resistance * | Gigaslash Resistance | Magic Burst Resistance | Drain Magic Resistance * |
| Strong | Strong | Weak | Immune |
| Whack Resistance * | Kamikazee Resistance * | Poison Resistance * | Paralysis Resistance * |
| Immune | Immune | Immune | Immune |
| Fuddle Resistance * | Snooze Resistance * | Dazzle Resistance * | Fizzle Resistance |
| Immune | Immune | Immune | Immune |
| Ban Dance Resistance | Gobstopper Resistance | Stun Resistance * | Sap Resistance * |
| Immune | Immune | Immune | Immune |
| Decelerate Resistance * | Curse Resistance | ||
| Immune | Immune | ||
DeathMore is present in all of his forms from VI, though his hands are part of his final form now and not separate monsters. The player will have to obtain nearly all other members of the boss family to breed all of his forms. He is also the boss of Old Man's Gate and is considered by the residents of GreatTree to be the strongest of the evil lords.
Dragon Quest Monsters 2
DeathMore

| Sprite | Level cap * | HP growth | MP growth |
 |
60 | 6/10 | 9/10 |
| Strength growth | Resilience growth | Wisdom growth | Agility growth |
| 8/10 | 6/10 | 7/10 | 7/10 |
| Family | ??? |
| In-game description | |
| Abilities | BigBang, HellBlast, TatsuCall |
| Habitat | |
| Breeding chart | Mirudraas x Azurile Mirudraas (Transformed) x Zoma Azurile, Mirudraas, Mirudraas (Transformed) |
| Frizz Resistance * | Sizz Resistance * | Fire Breath Resistance * | Bang Resistance * |
| Weak | Strong | Weak | Strong |
| Crack Resistance * | Ice Breath Resistance * | Woosh Resistance * | Rock/Army Resistance * |
| Strong | Strong | Weak | Weak |
| Water Resistance * | Zap Resistance * | Gigaslash Resistance | Magic Burst Resistance |
| Strong | Weak | None | Weak |
| Drain Magic Resistance * | Whack Resistance * | Kamikazee Resistance * | Poison Resistance * |
| Strong | Immune | Immune | Immune |
| Paralysis Resistance * | Fuddle Resistance * | Snooze Resistance * | Dazzle Resistance * |
| Strong | Immune | Immune | Immune |
| Fizzle Resistance | Ban Dance Resistance | Gobstopper Resistance | Stun Resistance * |
| Immune | Immune | Immune | Immune |
| Sap Resistance * | Decelerate Resistance * | Curse Resistance | |
| Immune | Immune | Immune | |
DeathMore (Transformed)
| Sprite | Level cap * | HP growth | MP growth |
 |
70 | 7/10 | 9/10 |
| Strength growth | Resilience growth | Wisdom growth | Agility growth |
| 8/10 | 6/10 | 7/10 | 7/10 |
| Family | ??? |
| In-game description | |
| Abilities | FireAir, Ramming, UltraDown |
| Habitat | |
| Breeding chart | DeathMore x Armorpion, Titanis |
| Frizz Resistance * | Sizz Resistance * | Fire Breath Resistance * | Bang Resistance * |
| Strong | Strong | Weak | Strong |
| Crack Resistance * | Ice Breath Resistance * | Woosh Resistance * | Rock/Army Resistance * |
| Strong | Strong | Strong | Strong |
| Water Resistance * | Zap Resistance * | Gigaslash Resistance | Magic Burst Resistance |
| Immune | Weak | Weak | Weak |
| Drain Magic Resistance * | Whack Resistance * | Kamikazee Resistance * | Poison Resistance * |
| Immune | Immune | Immune | Immune |
| Paralysis Resistance * | Fuddle Resistance * | Snooze Resistance * | Dazzle Resistance * |
| Strong | Immune | Immune | Immune |
| Fizzle Resistance | Ban Dance Resistance | Gobstopper Resistance | Stun Resistance * |
| Immune | Immune | Immune | Immune |
| Sap Resistance * | Decelerate Resistance * | Curse Resistance | |
| Strong | Strong | Immune | |
DeathMore (Final Form)
| Sprite | Level cap * | HP growth | MP growth |
 |
80 | 8/10 | 9/10 |
| Strength growth | Resilience growth | Wisdom growth | Agility growth |
| 9/10 | 7/10 | 7/10 | 7/10 |
| Family | ??? |
| In-game description | |
| Abilities | BigBang, DeMagic, Focus |
| Habitat | |
| Breeding chart | DeathMore (Transformed) x DarkMate, Mudou, Poseidon |
| Frizz Resistance * | Sizz Resistance * | Fire Breath Resistance * | Bang Resistance * |
| Immune | Immune | Strong | Immune |
| Crack Resistance * | Ice Breath Resistance * | Woosh Resistance * | Rock/Army Resistance * |
| Immune | Immune | Immune | Immune |
| Water Resistance * | Zap Resistance * | Gigaslash Resistance | Magic Burst Resistance |
| Immune | Strong | Strong | Weak |
| Drain Magic Resistance * | Whack Resistance * | Kamikazee Resistance * | Poison Resistance * |
| Immune | Immune | Immune | Immune |
| Paralysis Resistance * | Fuddle Resistance * | Snooze Resistance * | Dazzle Resistance * |
| Immune | Immune | Immune | Immune |
| Fizzle Resistance | Ban Dance Resistance | Gobstopper Resistance | Stun Resistance * |
| Immune | Immune | Immune | Immune |
| Sap Resistance * | Decelerate Resistance * | Curse Resistance | |
| Immune | Immune | Immune | |
Dragon Quest Monsters: Joker

Mortamor appears in his final form.
Mortamor  | |||||||||||||||||||||
| |||||||||||||||||||||
Dragon Quest Monsters: Joker 2
Motamor once again appears only in his final form.
Mortamor  | |||||||||||||||||||||||||||||||
| |||||||||||||||||||||||||||||||
Dragon Quest Monsters: Terry's Wonderland 3D
 |
This section is a stub. You can help by expanding it. |
Dragon Quest Monsters 2: Iru and Luca's Marvelous Mysterious Key
|
|
This section is a stub. You can help by expanding it. |
Dragon Quest Monsters: Joker 3
|
|
This section is a stub. You can help by expanding it. |
Dragon Quest Monsters: The Dark Prince
Mortamor (デスタムーア, Desutamuua ) Bestiary number: #508  | ||||||||||||||||||||||||||||||||||||||||||||||||
| ||||||||||||||||||||||||||||||||||||||||||||||||
| ||||||||||||||||||||||||||||||||||||||||||||||||


| ||||||


Dragon Quest Monsters: Super Light
|
|
This article is a stub. You can help by expanding it. |
Dragon Quest of the Stars
|
|
This article is a stub. You can help by expanding it. |
Dragon Quest Rivals
Mortamor's first form appeared on three separate cards. He first appeared as a legend rare card in the 3rd pack, "Phoenix and the Ringing of the Earth", as well as appearing on the skill card for Evil Prayer. When the app's name changed to Rivals Ace, he returned again in the third card pack on a card entitled "Mortamor, King of the Dread Realm". Due to the game's end of service, Mortamor's other forms never appeared in the game and his place is taken by Nokturnus as the final boss of Mortamor's Dreadlair in the Solo Battle Adventure mode.
Dragon Quest Walk
|
|
This article is a stub. You can help by expanding it. |
Dragon Quest Tact
All three of Mortamor's forms appear as S-rank members of the ??? family as part of the limited Dragon Quest VI event. His Old King form is faced in Chapter 5, Episode 2: Mortamor 1, while his hulking demonic second form, known simply as Mortamor, is faced in Chapter 5, Episode 3: Mortamor 2, while his final Archfiend form and is faced in Chapter 5, Episode 4: Mortamor 3, along with his Right and Left Hands.
His Old King and Archfiend forms can be faced in the "Free the Phantom Realm!" and "Mortamor's Challenge" boss battles, as well. Old King Mortamor appears on his own banner alongside Demon-at-arms and he can participate in the Low djinks's Battle Road as a party member.
[[File:Tact Icon File:Tact Icon SpecialFamily.png ???.png|link=File:Tact Icon SpecialFamily.png ??? family|30px]] [[File:DQTact Rank Icon  .png|24px]] Old King Mortamor (老王デスタムーア Rō Ō Desutamūa) .png|24px]] Old King Mortamor (老王デスタムーア Rō Ō Desutamūa) | ||||||||||||||||||||||||||||||||||||||||||||||||||||||||||||||||||||||||||||||||||||||||


Dragon Quest Keshi Keshi
|
|
This article is a stub. You can help by expanding it. |
Trivia
- Due to Mortamor being able to use Magic Burst, it is likely that he had Gracos seal away Sorceria so he would be the sole individual capable of casting the devastating spell.
- Unlike the other Demon Lords in the Zenithian Trilogy, Mortamor was given no further explanation as to his origins or personality in the remakes.
- It is reasonable to assume that Mortamor's yellow orbs are his source of energy, due to the fact that they are used to transform him. In Tact, they are known as the Narrow World Orbs, referencing his Dread Realm being a fissure between the Real and Dream worlds
- It appears that Mortamor has some unknown history with Nokturnus.
- In spinoff games such as Monsters Super Light, Mortamor is given various titles in order to differentiate which form he takes. In his first form, he is known as the "King of the Dread Realm" (狭間の王, Hazama no Ō) and the "Old King" (老王, Ro Ō). His second form is known as the "King of Wrath" (憤怒の王, Fundo no Ō) while his third form is known as the "King of Dreams" (夢幻の王, Mugen no Ō) or the Archfiend (大魔王, Daimaō).
Gallery
-
 2nd form artwork. (Super Famicom)
 -
 3rd form artwork. (Super Famicom)
 -
 3rd form artwork. (DS)
 -
 DQM: 1st Form. (GBC)
 -
 DQM: 2nd Form. (GBC)
 -
 DQM: 3rd Form. (GBC)
 -
 DQM II: 1st Form. (GBC)
 -
 DQM II: 2nd Form. (GBC)
 -
 DQM II: 3rd Form. (GBC)
 -
 DQM: 1st Form. (PSX)
 -
DQM: 2nd Form. (PSX)
-
DQM: 3rd Form. (PSX)
-
 DQMJ: 3rd Form.
 -
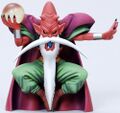 Mortamor. (Dragon Quest Sofubi Monster merchandise series)
 -
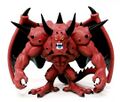 Mortamor in his second form. (Dragon Quest Sofubi Monster)
 -
 Dragon Quest - Metallic Monsters Gallery series.
 -
 Appearance in Stars.
 -
 Mortamor's second and third forms in Scan Battlers.
 -
 Rivals card.
 -
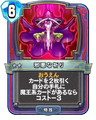 Evil Prayer skill card
 -
 King of the Dread Realm card
 -

-
 Old King Mortamor in Tact.
 -
 Mortamor's second form in Tact.
 -
 Archfiend Mortamor in Tact
 -


Categories:
- Pages with broken file links
- Pages using Tabber parser tag
- Articles with section stubs
- Stubs
- Final bosses
- Dragon Quest VI bosses
- Dragon Quest VI characters
- Dragon Quest VI enemies
- Dragon Quest IX bosses
- Dragon Quest IX enemies
- Dragon Quest Monsters enemies
- Dragon Quest Monsters 2 enemies
- Dragon Quest Monsters: Joker enemies
- Dragon Quest Monsters: Joker 2 enemies
- Dragon Quest Monsters: Terry's Wonderland 3D enemies
- Dragon Quest Monsters 2: Iru and Luca's Marvelous Mysterious Key enemies
- Dragon Quest Monsters: Joker 3 enemies
- Dragon Quest Monsters: The Dark Prince enemies
- Dragon Quest Monsters: Super Light enemies
- Dragon Quest of the Stars characters
- Dragon Quest of the Stars enemies
- Dragon Quest Rivals characters
- Dragon Quest Rivals enemies
- Dragon Quest Walk enemies
- Dragon Quest Tact bosses
- Dragon Quest Tact characters
- Dragon Quest Tact monsters
- Dragon Quest Keshi Keshi enemies