Mutsumi Inomata: Difference between revisions
Shy-Guy2002 (talk | contribs) |
Shy-Guy2002 (talk | contribs) →Cover Art: Updated galley |
||
| (5 intermediate revisions by 2 users not shown) | |||
| Line 14: | Line 14: | ||
===Cover Art=== | ===Cover Art=== | ||
Some of Inomata's cover art in the Dragon Quest series include the following: | Some of Inomata's cover art in the Dragon Quest series include the following: | ||
<center><gallery perrow= | <center><gallery perrow="8"> | ||
DQIHeroInomata.png|The [[Hero (Dragon Quest)|descendant]] of Erdrick. | File:DQIHeroInomata.png|The [[Hero (Dragon Quest)|descendant]] of Erdrick. | ||
File:Scion of Erdrick Mutsumi Inomata.png|The descendant wielding [[Erdrick's sword]]. | File:Scion of Erdrick Mutsumi Inomata.png|The descendant wielding [[Erdrick's sword]]. | ||
File:Hero and Gwaelin.png|The Hero and [[Princess Gwaelin]]. | File:Hero and Gwaelin.png|The Hero and [[Princess Gwaelin]]. | ||
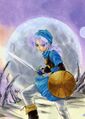
File:Fighting the Dragonlord.jpg|Protecting the princess from a dragon. | File:Fighting the Dragonlord.jpg|alt=Protecting the princess from a dragon. | ||
File:Sleeping Hero.jpg|The Hero resting. | File:Sleeping Hero.jpg|alt=The Hero resting. | ||
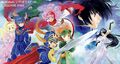
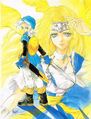
File:Luminaries of the Legendary Line.jpg|The [[Dragon Quest II|Luminaries of the Legendary Line]]. | File:Luminaries of the Legendary Line.jpg|The [[Dragon Quest II|Luminaries of the Legendary Line]]. | ||
File:Moonbrooke.png|The [[Princess of Moonbrooke]]. | File:Moonbrooke.png|The [[Princess of Moonbrooke]] & Gard. | ||
File:DQ2 Inomata.jpeg|Cover art for the novel adaptation of II. | |||
File:DQIII Mutsumi Inomata.png|The Hero [[Erdrick]] and companions. | File:DQIII Mutsumi Inomata.png|The Hero [[Erdrick]] and companions. | ||
File:InomataErdrick.png|The Hero in the [[Auroral Armour]]. | File:InomataErdrick.png|The Hero in the [[Auroral Armour]]. | ||
File:DQIII Mutsumi Inomata Mage.jpeg | |||
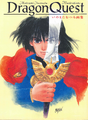
File:Dragon Quest III Novel art.jpeg|alt=Dragon Quest III Cover art.|Cover art for the novel adaptation of III. | |||
File:30th Anniversary Cover Art.jpeg|Cover art for the 30th anniversary of the Erdrick Trilogy novels. | |||
File:InomataRubiss.png|Goddess [[Rubiss]] in the novel 'Legend of Rubiss'. | File:InomataRubiss.png|Goddess [[Rubiss]] in the novel 'Legend of Rubiss'. | ||
File:InomataRubiss2.jpg|Rubbiss in the second volume. | File:InomataRubiss2.jpg|Rubbiss in the second volume. | ||
Inomata Rubiss.png|Rubiss in the final volume. | File:Inomata Rubiss.png|Rubiss in the final volume. | ||
File:RagnarInomata.png | File:RagnarInomata.png|[[Ragnar McRyan]]. | ||
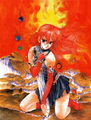
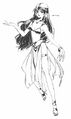
File:Mutsumi Inomata Alena.png|Tsarevna [[Alena]]. | File:Mutsumi Inomata Alena.png|Tsarevna [[Alena]]. | ||
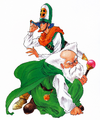
File:Kiryl&Borya.png|[[Kiryl]] & [[Borya]]. | File:Kiryl&Borya.png|[[Kiryl]] & [[Borya]]. | ||
File:InomataTorneko.png|[[Torneko Taloon]]. | File:InomataTorneko.png|[[Torneko Taloon]]. | ||
File:Meena & Maya Mutsumi Inomata.jpeg|[[Meena]] & [[Maya Mahabala]] | |||
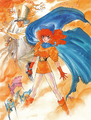
File:Inomata Solo.png|[[Hero (Dragon Quest IV)|Hero Solo]] | File:Inomata Solo.png|[[Hero (Dragon Quest IV)|Hero Solo]] | ||
AlenaInomata.png|The Zamoksvans. | File:DQ Illustrations Page 52.jpg|[[Psaro (Character)|Psaro]] | ||
File:DQ Illustrations Page 24.jpg | |||
File:AlenaInomata.png|The Zamoksvans. | |||
File:InomataMaya&Meena.png|Mahabala sisters. | File:InomataMaya&Meena.png|Mahabala sisters. | ||
File:The Chosen.jpg|The [[Chosen Ones|Chosen]] united. | File:The Chosen.jpg|The [[Chosen Ones|Chosen]] united. | ||
DQ Illustrations Full Page Psaro Artwork.jpg|Hero Solo and Psaro. | File:DQ Illustrations Full Page Psaro Artwork.jpg|Hero Solo and Psaro. | ||
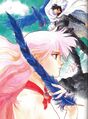
File:Hero Solo facing Psaro.jpg|Hero Solo facing Psaro. | File:Hero Solo facing Psaro.jpg|Hero Solo facing Psaro. | ||
Mutsumi SaroAndRosa.jpg|Psaro and [[Rose]]. | File:Mutsumi SaroAndRosa.jpg|Psaro and [[Rose]]. | ||
Inomata Hero and Bianca Young.png|[[Bianca]] and | File:Inomata Hero and Bianca Young.png|[[Bianca]] and the hero. | ||
DQV Novel Hero and Bianca Art.png|The two as adults. | File:DQV Novel Hero and Bianca Art.png|The two as adults. | ||
File:The Hero and his children.png|The [[Prince of Gotha|Hero's]] [[Princess of Gotha|children]]. | File:The Hero and his children.png|The [[Prince of Gotha|Hero's]] [[Princess of Gotha|children]]. | ||
Dragon Quest VI Mutsumi Inomata.png|The Heroes of VI. | File:Dragon Quest VI Mutsumi Inomata.png|The Heroes of VI. | ||
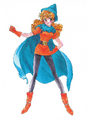
File:Ashlynn Mutsumi Inomata.jpg|[[Ashlynn|The Runaway Teen]]. | File:Ashlynn Mutsumi Inomata.jpg|[[Ashlynn|The Runaway Teen]]. | ||
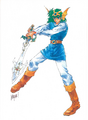
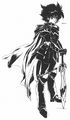
File:Terry Mutsumi Inomata.jpg|[[Terry|The Swordsman in Blue]] | File:Terry Mutsumi Inomata.jpg|[[Terry|The Swordsman in Blue]] | ||
File:Terry & Milly by Mutsumi Inomata.jpg|The Swordsman and the [[Milly|Mysterious Girl]] | File:Terry & Milly by Mutsumi Inomata.jpg|The Swordsman and the [[Milly|Mysterious Girl]] | ||
File:Inomata Illustrations.png|Cover art for Mutsumi Inomata's Dragon Quest Illustrations. | File:Inomata Illustrations.png|Cover art for Mutsumi Inomata's Dragon Quest Illustrations. | ||
DQI CD Theater.png|Cover art for the original [[Dragon Quest I CD Theater|Dragon Quest CD Theater]]. | File:DQI CD Theater.png|Cover art for the original [[Dragon Quest I CD Theater|Dragon Quest CD Theater]]. | ||
File:DQV CD Theater 1.png|Cover art for the first [[Dragon Quest V CD Theater]]. | |||
File:Dragon Quest | File:DQV CD Theater 2.png|Cover art for the second [[Dragon Quest V CD Theater]]. | ||
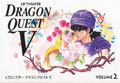
File: | File:DQV CD Theater 3.png|Cover art for the third [[Dragon Quest V CD Theater]]. | ||
File:DQVI CD Theater 1.png|Cover art for the first [[Dragon Quest VI CD Theater]]. | |||
File:DQVI CD Theater 2.png|Cover art for the second [[Dragon Quest VI CD Theater]]. | |||
</gallery></center> | </gallery></center> | ||
===Novel Illustrations=== | ===Novel Illustrations=== | ||
Some of Inomata's artwork in the Dragon Quest novels include the following: | Some of Inomata's artwork in the Dragon Quest novels include the following: | ||
<center><gallery perrow=9> | <center><gallery perrow="9"> | ||
DQ1 Hero and Garcilla.jpg|The [[Hero (Dragon Quest)|Hero]] and Garcilla. | DQ1 Hero and Garcilla.jpg|The [[Hero (Dragon Quest)|Hero]] and an original character: Garcilla. | ||
DQ1 Gwaelin.jpg|[[Princess Gwaelin]]. | DQ1 Gwaelin.jpg|[[Princess Gwaelin]]. | ||
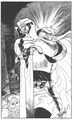
DQ1 Sunstone.jpg|The Sunstone reacting to the Hero. | DQ1 Sunstone.jpg|The [[Sunstone]] reacting to the Hero. | ||
DQ1 Captive Gwaelin.jpg|Gwaelin during her six month imprisonment. | DQ1 Captive Gwaelin.jpg|Gwaelin during her six month imprisonment. | ||
DQ1 Golem.jpg|The Hero's encounter with the [[Golem]]. | DQ1 Golem.jpg|The Hero's encounter with the [[Golem]]. | ||
| Line 64: | Line 73: | ||
DQ2 Cannock.jpg|The [[Prince of Cannock]]. | DQ2 Cannock.jpg|The [[Prince of Cannock]]. | ||
DQ2 Moonbrooke.jpg|The [[Princess of Moonbrooke]]. | DQ2 Moonbrooke.jpg|The [[Princess of Moonbrooke]]. | ||
DQ2 Novel OC.jpg|An original character from the DQ2 novel. | DQ2 Novel OC.jpg|An original character from the DQ2 novel: Gard. | ||
DQ2 Badboon.jpg|The two princes battling a [[Badboon]]. | DQ2 Badboon.jpg|The two princes battling a [[Badboon]]. | ||
DQ2 Cannock Bashful.jpg|The Prince of Cannock being bashful. | DQ2 Cannock Bashful.jpg|The Prince of Cannock being bashful. | ||
DQ2 New Evil.jpg|The Luminaries encountering | DQ2 New Evil.jpg|The Luminaries encountering Gard. | ||
DQ2 Midenhall fighting.jpg|The Prince of Midenhall engaging in a duel. | DQ2 Midenhall fighting.jpg|The Prince of Midenhall engaging in a duel. | ||
DQ2 Sword of Erdrick.jpg|Reclaiming a withered [[Erdrick's Sword]]. | DQ2 Sword of Erdrick.jpg|Reclaiming a withered [[Erdrick's Sword]]. | ||
| Line 80: | Line 89: | ||
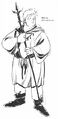
DQ3 Male Merchant.jpg|Male [[Merchant]]. | DQ3 Male Merchant.jpg|Male [[Merchant]]. | ||
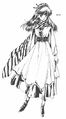
DQ3 Male Gadabout.jpg|Male [[Gadabout]]. | DQ3 Male Gadabout.jpg|Male [[Gadabout]]. | ||
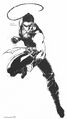
DQ3 Villain.jpg|An original villain the DQ3 novel: Chiko. | DQ3 Villain.jpg|An original villain in the DQ3 novel: Chiko. | ||
DQ3 Hero.jpg | DQ3 Hero.jpg | ||
DQ3 Party.jpg|The party of 3. | DQ3 Party.jpg|alt=The party of 3. | ||
DQ3 Robbin Ood.jpg|Defeating [[Robbin' 'Ood]]. | DQ3 Robbin Ood.jpg|Defeating [[Robbin' 'Ood]]. | ||
File:DQ3 Martial Artist Claw.jpg|The Martial Artist defeating a [[Lump Wizard]]. | File:DQ3 Martial Artist Claw.jpg|The Martial Artist defeating a [[Lump Wizard]]. | ||
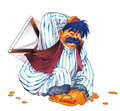
DQ3 Puff Puff.jpg|The | DQ3 Puff Puff.jpg|The Priest about to experience a [[Puff Puff]] in Asham. | ||
DQ3 Mountaincleaver.jpg|The Hero getting disarmed of the [[Mountaincleaver]]. | DQ3 Mountaincleaver.jpg|The Hero getting disarmed of the [[Mountaincleaver]]. | ||
DQ3 Necklace.jpg|The Hero and Mage with matching necklaces. | DQ3 Necklace.jpg|The Hero and Mage with matching necklaces. | ||
DQ3 Monster.jpg | DQ3 Monster.jpg | ||
DQ LoR Rubiss.jpg|The Goddess [[Rubiss|Rubiss Apisto Callichthys]]. | |||
DQ LoR Dialt 1.jpg|Dialt Centropyge. | |||
DQ LoR Regnas 1.jpg|Cryptocaryon Regnas. | |||
DQ LoR Guamon.jpg|Guamon Semiaquilus Callichthys | |||
DQ LoR Datnioides.jpg|Datniodes Bacoba Corydoras. | |||
DQ LoR Sifil.jpg|Sifil Loricatas Polypterus. | |||
DQ LoR Miralda.jpg|Miralda Cichlasoma Otocinclus. | |||
DQ LoR Perla.jpg|Perla Nana Anubias. | |||
DQ LoR Yabe Yabe.jpg|Yabe Yabe | |||
DQ LoR Father Daughter.jpg | |||
DQ LoR Flight.jpg | |||
DQ LoR Rubiss 2.jpg|Rubiss sitting beside a window. | |||
DQ LoR Dialt 2.jpg|Dialt laying beside a cliff. | |||
DQ LoR Regnas 2.jpg | |||
DQ LoR Servants.jpg|Rubiss being attended to by servants. | |||
DQ LoR Village.jpg|Dialt visiting a village. | |||
DQ LoR Birds.jpg|alt=A flock of birds. | |||
DQ LoR Dragon.jpg|Dialt's encounter with a dragon. | |||
DQ LoR Fight.jpg|Cryptocaryon engaged in a battle. | |||
DQ LoR Dialt 3.jpg|Dialt casting a spell. | |||
DQ4 Ragnar.jpg|[[Ragnar McRyan]]. | DQ4 Ragnar.jpg|[[Ragnar McRyan]]. | ||
DQ4 Alena.jpg|[[Alena]]. | DQ4 Alena.jpg|[[Alena]]. | ||
Latest revision as of 01:33, 2 June 2026
Mutsumi Inomata (いのまたむつみ) was a Japanese illustrator and animator. She was born in the Kanagawa Prefecture on December 23, 1960, and passed away on March 10, 2024.
Works[edit | edit source]
Mutsumi Inomata worked in a good deal of anime and video games since the 80s as a freelance. She is best known for her work on the characters and cover art for the "Tales of" series from Bandai Namco.
Inomata's paintings had a very bright, distinct, colorful watercolor style.
Inomata and Dragon Quest[edit | edit source]
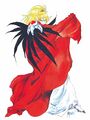
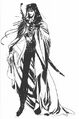
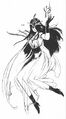
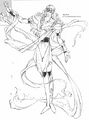
Inomata drew multiple illustrations for the Dragon Quest series. Her artworks served to illustrate the CD Theater dramas for the first six games in the series, as well as for some of the novelizations. She also illustrated the Rubiss novel series, giving the goddess a bright red hair color.
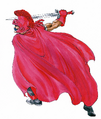
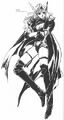
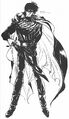
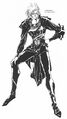
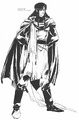
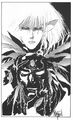
One of her most notable influences on the series as a whole is her portrayal of Psaro, giving him a bishonen look with wild long silver hair, an appearance close to that of Jareth, the character David Bowie portrayed in the movie Labyrinth (1986).
Gallery[edit | edit source]
Cover Art[edit | edit source]
Some of Inomata's cover art in the Dragon Quest series include the following:
-
 The descendant of Erdrick.
 -
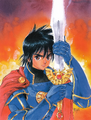 The descendant wielding Erdrick's sword.
 -
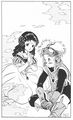
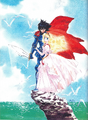 The Hero and Princess Gwaelin.
 -
-
-
-
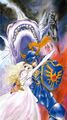
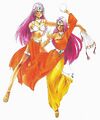
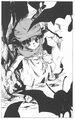
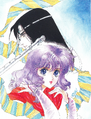 The Princess of Moonbrooke & Gard.
 -
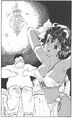
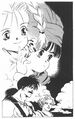
 Cover art for the novel adaptation of II.
 -
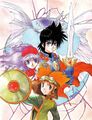
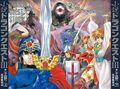
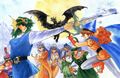
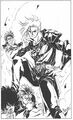
 The Hero Erdrick and companions.
 -
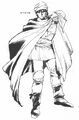
 The Hero in the Auroral Armour.
 -

-
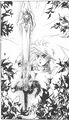
 Cover art for the novel adaptation of III.
 -
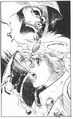
 Cover art for the 30th anniversary of the Erdrick Trilogy novels.
 -
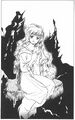
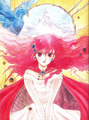 Goddess Rubiss in the novel 'Legend of Rubiss'.
 -
 Rubbiss in the second volume.
 -
 Rubiss in the final volume.
 -
-
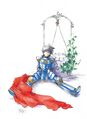
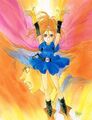
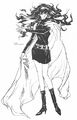
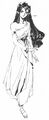
 Tsarevna Alena.
 -
-
-
-
-

-
-
 The Zamoksvans.
 -
 Mahabala sisters.
 -
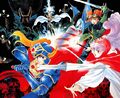
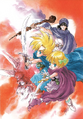
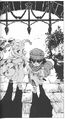
 The Chosen united.
 -
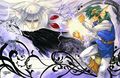
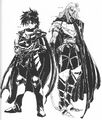
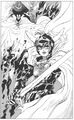
 Hero Solo and Psaro.
 -
 Hero Solo facing Psaro.
 -
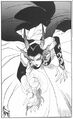
 Psaro and Rose.
 -
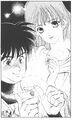
 Bianca and the hero.
 -
 The two as adults.
 -
-
 The Heroes of VI.
 -
-
-
 The Swordsman and the Mysterious Girl
 -
 Cover art for Mutsumi Inomata's Dragon Quest Illustrations.
 -
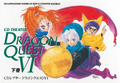
 Cover art for the original Dragon Quest CD Theater.
 -
 Cover art for the first Dragon Quest V CD Theater.
 -
 Cover art for the second Dragon Quest V CD Theater.
 -
 Cover art for the third Dragon Quest V CD Theater.
 -
 Cover art for the first Dragon Quest VI CD Theater.
 -
 Cover art for the second Dragon Quest VI CD Theater.


Novel Illustrations[edit | edit source]
Some of Inomata's artwork in the Dragon Quest novels include the following:
-
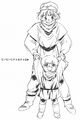
 The Hero and an original character: Garcilla.
 -
-
 The Sunstone reacting to the Hero.
 -
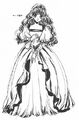
 Gwaelin during her six month imprisonment.
 -
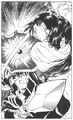
 The Hero's encounter with the Golem.
 -
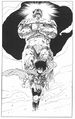
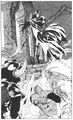
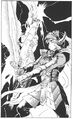
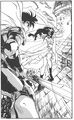
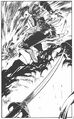
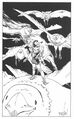
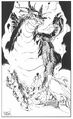
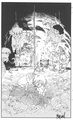
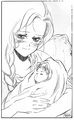
 The Hero's final battle with the Dragonlord.
 -
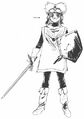
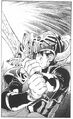
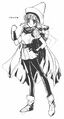
 The Prince of Midenhall.
 -
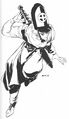
 The Prince of Cannock.
 -
-
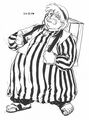
 An original character from the DQ2 novel: Gard.
 -
 The two princes battling a Badboon.
 -
 The Prince of Cannock being bashful.
 -
 The Luminaries encountering Gard.
 -
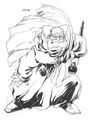
 The Prince of Midenhall engaging in a duel.
 -
 Reclaiming a withered Erdrick's Sword.
 -
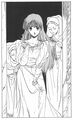
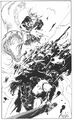
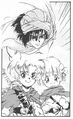
 The Princes wielding Erdrick's Sword and the Thunderbolt Blade.
 -
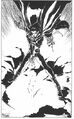
 The False Idol.
 -

-
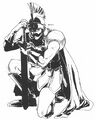
 The Hero Erdrick.
 -
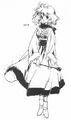
 Female Warrior.
 -
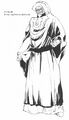
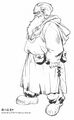
 Male Priest.
 -
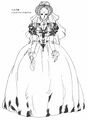
 Female Mage.
 -
 Male Martial artist.
 -
 Male Merchant.
 -
 Male Gadabout.
 -
 An original villain in the DQ3 novel: Chiko.
 -
-
-
 Defeating Robbin' 'Ood.
 -
 The Martial Artist defeating a Lump Wizard.
 -
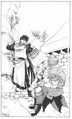
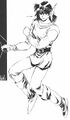
 The Priest about to experience a Puff Puff in Asham.
 -
 The Hero getting disarmed of the Mountaincleaver.
 -
 The Hero and Mage with matching necklaces.
 -
-
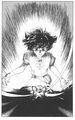
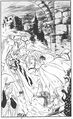
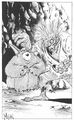
 The Goddess Rubiss Apisto Callichthys.
 -
 Dialt Centropyge.
 -
 Cryptocaryon Regnas.
 -
 Guamon Semiaquilus Callichthys
 -
 Datniodes Bacoba Corydoras.
 -
 Sifil Loricatas Polypterus.
 -
 Miralda Cichlasoma Otocinclus.
 -
 Perla Nana Anubias.
 -
 Yabe Yabe
 -
-

-
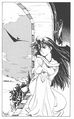 Rubiss sitting beside a window.
 -
 Dialt laying beside a cliff.
 -
-
 Rubiss being attended to by servants.
 -
 Dialt visiting a village.
 -
-
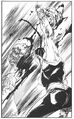
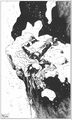
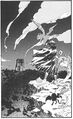
 Dialt's encounter with a dragon.
 -
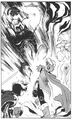
 Cryptocaryon engaged in a battle.
 -
 Dialt casting a spell.
 -
-
-
-
-
-
-
-
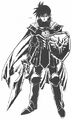
 Hero Solo.
 -
 Ragnar partnering with Healie.
 -
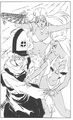
 Psaro’s Pawn abducting kids in search of the hero.
 -
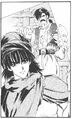
 Torneko with a Steel Strongbox.
 -
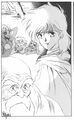 Borya meeting the Legendary Hero.
 -
 Alena, Kiryl, and Maya hiding from a monster.
 -
 Kiryl dancing with Meena and Maya.
 -
 Hero Solo finding the Zenithian sword.
 -
 The Zenithian Hero.
 -
-
 The childhood of the Hero.
 -
 The Hero surrounded by Drackies.
 -
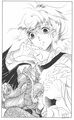
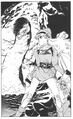
 Bianca and the Hero braving the haunted mansion.
 -
 Bianca’s giving Saber her ribbon.
 -
 A Walking Corpse and Cross Eye.
 -
 Saber reuniting with his master after 10 years.
 -
 The Legendary Monster Wrangler.
 -
 The birth of the legendary hero.
 -
 The Hero meeting his kids several years later.
 -
 The Hero meeting his father again.


