Restless armour: Difference between revisions
Please double check if this enemy spoke in Estark's Crypt. |
No edit summary |
||
| Line 1: | Line 1: | ||
<center><small> For the cursed armor from {{Dragon Quest V}}, see [[Restless armour (Equipment)]]. </small></center> | <center><small> For the cursed armor from {{Dragon Quest V}}, see [[Restless armour (Equipment)]]. </small></center> | ||
{{Monster Infobox | {{Monster Infobox | ||
|name=Restless armour | |name=Restless armour | ||
| Line 9: | Line 7: | ||
|caption=Art by [[Akira Toriyama]] | |caption=Art by [[Akira Toriyama]] | ||
|old=Rogue Knight<br>RogueNite | |old=Rogue Knight<br>RogueNite | ||
|firstappear= {{ | |firstappear= {{DQ3}} | ||
}} | }} | ||
The '''Restless Armour''' is a recurring {{MFamilies}} in the {{DQSeries}}. | |||
Introduced in {{Dragon Quest III}}, it is an empty suit of armour that has taken on a life of its own. | |||
==Characteristics== | ==Characteristics== | ||
Restless | Restless armours are simple blue [[Material family|suits of armour]] armed with a {{Sword}} and [[Shield]]. They are the souls of swordsmen who have returned to the mortal realm by possessing suits of armour to continue fighting, though some spin-offs ignore this established notion and have fun alluding to what could really be inside the plates of steel. | ||
Typically a physical powerhouse, Restless armours will strike with their swords and occasionally deliver critical blows, regularly depicted as a full-force swing after the Restless armour's upper body winds back at the waist. While usually without magical abilities, they can often call [[Healslime]]s into the battle to undo any damage they took. | Typically a physical powerhouse, Restless armours will strike with their swords and occasionally deliver critical blows, regularly depicted as a full-force swing after the Restless armour's upper body winds back at the waist. While usually without magical abilities, they can often call [[Healslime]]s into the battle to undo any damage they took. | ||
| Line 36: | Line 38: | ||
|agility=10 | |agility=10 | ||
|spells=None | |spells=None | ||
|skills={{Brutal strike}}<br>Call for help ([[Healslime]]) | |skills={{Brutal strike}}<br>Call for help. ([[Healslime]]) | ||
|item=[[Copper sword]]{{fraction|1|64}} | |item=[[Copper sword]]{{fraction|1|64}} | ||
|locations=[[Romaria]] region<br>[[Gaia's Navel]] | |locations=[[Romaria]] region<br>[[Gaia's Navel]] | ||
| Line 96: | Line 98: | ||
|remake-changes=None | |remake-changes=None | ||
}} | }} | ||
A Restless armour | A Restless armour {{NPC}} appears at the end of [[Estark's Crypt]] along with {{Psaro C}} after the defeat of [[Estark]] by the {{Party 4}}, with Psaro shocked at what he saw. After a [[Minidemon]] tells {{Psaro C}} about [[Rose]]'s kidnapping, they leave the crypt. It does not have any dialogue in those cut scenes. | ||
==={{DQ5}}=== | ==={{DQ5}}=== | ||
| Line 267: | Line 269: | ||
|elemental-resist=0% | |elemental-resist=0% | ||
}} | }} | ||
====Vicious==== | ====Vicious==== | ||
{{DQ11Enemy | {{DQ11Enemy | ||
| Line 499: | Line 502: | ||
|bskill2=[[Blast Slash]]{{tt|*|Level 16}} | |bskill2=[[Blast Slash]]{{tt|*|Level 16}} | ||
|bskill3='''Talent Blossoming''': [[Unbridled Blade]] | |bskill3='''Talent Blossoming''': [[Unbridled Blade]] | ||
|askill1=[[Bang]]-type Physical Potency +5% / Stats Up | |askill1=[[Bang]]-type Physical Potency +5%/Stats Up | ||
|askill2=[[Frizz]] Res +25 / Stats Up | |askill2=[[Frizz]] Res +25/Stats Up | ||
|askill3=[[Blast Slash]] Potency +5% / Stats Up | |askill3=[[Blast Slash]] Potency +5%/Stats Up | ||
|askill4=[[Sizz]] Res +25 / Stats Up | |askill4=[[Sizz]] Res +25/Stats Up | ||
|askill5=[[Blast Slash]] Potency +5% / Stats Up | |askill5=[[Blast Slash]] Potency +5%/Stats Up | ||
|lperk1=N/a | |lperk1=N/a | ||
|bperk1=ATK +3 | |bperk1={{ATK}} +3 | ||
|bperk2=[[Blast Slash]] Potency +2% | |bperk2=[[Blast Slash]] Potency +2% | ||
|bperk3=N/a | |bperk3=N/a | ||
| Line 588: | Line 591: | ||
|debilitation-resist=Normal | |debilitation-resist=Normal | ||
}} | }} | ||
==Gallery== | ==Gallery== | ||
<center><gallery> | <center><gallery> | ||
Restless Armour Famicom.png|{{Famicom}} art. | Restless Armour Famicom.png|{{Famicom}} art. | ||
DQ_IV_Android_Estark%27s_Crypt_10.jpg|A Restless armour with | DQ_IV_Android_Estark%27s_Crypt_10.jpg|A Restless armour with {{Psaro C}} in [[Estark's Crypt]] in {{IV}}. | ||
DQ_IV_Android_Estark%27s_Crypt_11.jpg| | DQ_IV_Android_Estark%27s_Crypt_11.jpg| | ||
DQ_IV_Android_Estark%27s_Crypt_12.jpg|Leaving. | DQ_IV_Android_Estark%27s_Crypt_12.jpg|Leaving. | ||
| Line 627: | Line 619: | ||
</gallery></center> | </gallery></center> | ||
==Similar species== | |||
*[[Deserted armour]] | |||
*[[Gyldenbritches]] | |||
*[[Infernal armour]] | |||
*[[IronNite]] | |||
*[[Lethal armour]] | |||
*[[Robbin' 'oodlum]] | |||
*[[Roseguardin]] | |||
*[[Schwarzchuld]] | |||
*[[Tanzaknight]] | |||
[[Category:Dragon Quest III enemies]] | [[Category:Dragon Quest III enemies]] | ||
Revision as of 00:13, 27 December 2023
| Dragon Quest monster | |
|---|---|
| Restless armour | |
 Art by Akira Toriyama | |
| Japanese | さまようよろい |
| Romaji | Samayō yoroi |
| First appearance | Dragon Quest III: The Seeds of Salvation |
| Old localisation | Rogue Knight RogueNite |
The Restless Armour is a recurring monster in the Dragon Quest series.
Introduced in Dragon Quest III, it is an empty suit of armour that has taken on a life of its own.
Characteristics
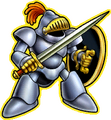
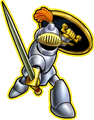
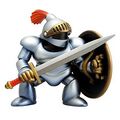
Restless armours are simple blue suits of armour armed with a Sword and Shield. They are the souls of swordsmen who have returned to the mortal realm by possessing suits of armour to continue fighting, though some spin-offs ignore this established notion and have fun alluding to what could really be inside the plates of steel.
Typically a physical powerhouse, Restless armours will strike with their swords and occasionally deliver critical blows, regularly depicted as a full-force swing after the Restless armour's upper body winds back at the waist. While usually without magical abilities, they can often call Healslimes into the battle to undo any damage they took.
Restless armours have been shown to speak with a degree of nobility to their words, as one might expect of a knight. Their speech also tends to be interrupted by sudden 'clank!'s, possibly from their visors falling down or maybe simply due to their being nothing but clattering armor.
Appearances
Dragon Quest III: The Seeds of Salvation
Restless armor (さまようよろい Samayō yoroi) Bestiary Number: #028  | |||||||||||||||||||||||||||||||||||||||
| Resistances | |||||||||||||||||||||||||||||||||||||||
| |||||||||||||||||||||||||||||||||||||||
| Additional information | |||||||||||||||||||||||||||||||||||||||
| |||||||||||||||||||||||||||||||||||||||


Dragon Quest IV: Chapters of the Chosen
Restless armour (さまようよろい, Samayō yoroi ) Big Book of Beasts No. : #043  | |||||||||||||||||||||||||||||||||||||||||||||
| |||||||||||||||||||||||||||||||||||||||||||||
| |||||||||||||||||||||||||||||||||||||||||||||

A Restless armour NPC appears at the end of Estark's Crypt along with Psaro after the defeat of Estark by the party, with Psaro shocked at what he saw. After a Minidemon tells Psaro about Rose's kidnapping, they leave the crypt. It does not have any dialogue in those cut scenes.
Dragon Quest V: Hand of the Heavenly Bride
Restless armour (さまようよろい, Samayō yoroi ) Big Book of Beasts No. : #062  | ||||||||||||||||||||||||||||||||||||||||||||||||
| ||||||||||||||||||||||||||||||||||||||||||||||||
| ||||||||||||||||||||||||||||||||||||||||||||||||


Though present in the original game, Restless armours couldn't be recruited until the remakes. In all versions of the game, there is a cursed suit of armor with the same name, which transforms the wearer into the monster until it is removed through benediction at a church. The Attack stat becomes 69, Defence 54, and Agility 43, and will not increase upon leveling up until removed.
Dragon Quest VIII: Journey of the Cursed King
Restless armour (さまようよろい, Samayō yoroi ) Defeated Monster List No. : #067  | ||||||||||||||||||||||||||||||||||||||||||||||||||||||||
| ||||||||||||||||||||||||||||||||||||||||||||||||||||||||
| ||||||||||||||||||||||||||||||||||||||||||||||||||||||||

Dragon Quest IX: Sentinels of the Starry Skies
| ##057 - Restless armour | |||||||||||||||||||||||||||||||||||||||||||
|---|---|---|---|---|---|---|---|---|---|---|---|---|---|---|---|---|---|---|---|---|---|---|---|---|---|---|---|---|---|---|---|---|---|---|---|---|---|---|---|---|---|---|---|

| |||||||||||||||||||||||||||||||||||||||||||
| |||||||||||||||||||||||||||||||||||||||||||
| Dropped Item | Iron broadsword1⁄64 Iron armour1⁄128 | ||||||||||||||||||||||||||||||||||||||||||
| Locations | Tower of Trades Dourbridge Lonely Plains Grotto | ||||||||||||||||||||||||||||||||||||||||||
| Skills | Call for backup (Healslime) Morale Masher | ||||||||||||||||||||||||||||||||||||||||||
| Family | Material | ||||||||||||||||||||||||||||||||||||||||||
| Bestiary # | #057 | ||||||||||||||||||||||||||||||||||||||||||
| Game | Dragon Quest IX | ||||||||||||||||||||||||||||||||||||||||||
| Console | DS | ||||||||||||||||||||||||||||||||||||||||||
| Japanese Name | さまようよろい | ||||||||||||||||||||||||||||||||||||||||||
| Romanized Jap. | Samayō yoroi | ||||||||||||||||||||||||||||||||||||||||||
| Description | Chivalrous champions who like to fight fair and square. Beware the tension-trashing Morale Masher. Suits of armour that have soaked up sorrowful swordsmen's souls. Healslime helpers make them hard to hurt. | ||||||||||||||||||||||||||||||||||||||||||
Dragon Quest X
Reappearing from Version 2 of the game onwards, they are first found in the False Renshinda and can also be recruited by players in the Item Master vocation.
Dragon Quest XI: Echoes of an Elusive Age
Restless armour (さまようよろい, Samayō yoroi ) Defeated Monster List No. : #059  | ||||||||||||||||||||||||||||||||||||||||||||||||||||||||||||||||
| ||||||||||||||||||||||||||||||||||||||||||||||||||||||||||||||||
| ||||||||||||||||||||||||||||||||||||||||||||||||||||||||||||||||

Vicious
Vicious restless armour (さまようよろい・強, Samayō yoroi・kyō ) Defeated Monster List No. : #343 | ||||||||||||||||||||||||||||||||||||||||||||||||||||||||||||||||
| ||||||||||||||||||||||||||||||||||||||||||||||||||||||||||||||||
| ||||||||||||||||||||||||||||||||||||||||||||||||||||||||||||||||
| ||||||||||||||||||||||||||||||||||||||||||||||||||||||||||||||||
Dragon Quest Monsters
RogueNite (さまようよろい, Samayō yoroi )  | |||||||||||||||||||||||||||||||||||||||||||||||||||||||||||||||||||||||||||||||||||||||||||||||||||||||||

Dragon Quest Monsters 2
RogueNite (さまようよろい, Samayō yoroi )  | |||||||||||||||||||||||||||||||||||||||||||||||||||||||||||||||||||||||||||||||||||||||||||||||||||||||||||

Dragon Quest Monsters: Caravan Heart
 |
This article is a stub. You can help by expanding it. |
Dragon Quest Monsters: Joker
Restless armour  | |||||||||||||||||||||||||||||||||||||||||||||
| |||||||||||||||||||||||||||||||||||||||||||||
Dragon Quest Monsters: Joker 2
Restless armour  | |||||||||||||||||||||||||||||||||||||||||||||||||
| |||||||||||||||||||||||||||||||||||||||||||||||||
Dragon Quest Heroes: Rocket Slime
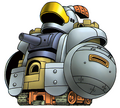
Restless armours first appear and can only be found in the game's final area, the Flying Clawtress. They can use their shields to block frontal attacks, though being struck once from behind will cause them to drop it and lose their defensive prowess. A Restless armour defeated outside of a tank battle will always drop a Steel broadsword if a lucky bag isn't produced.
Dragon Quest Heroes: The World Tree's Woe and the Blight Below

| Model | Experience | Gold |
 |
30 | 25g |
| List No. | #014 |
| Field Notes | Armour animated by the souls of slain swordsmen. Their skill with sword and shield was honed over countless clashes. They share a rich rapport with healslimes, whose reparatory powers they rely upon in the all-consuming chaos of combat. |
| Location(s) | Arba Castle (Hero), Caliburgh (Captain), Colissea (Recruit, Captain), Colissean Desert (Recruit, Captain), Sylvea (Recruit, Captain) |
| Item(s) Dropped | Evencloth, Iron ore |
Dragon Quest Heroes II

| Model | Experience | Gold | Marked Version? |
|
88 | 45g | Yes |
| List No. | #040 |
| Field Notes | Armour animated by the souls of slain swordsmen. Their skill with sword and shield was honed over countless clashes. They share a rich rapport with healslimes, whose reparatory powers they rely upon in the all-consuming chaos of combat. |
| Location(s) | The Lumberlands, The Battle of Ingenia |
| Item(s) Dropped | Iron ore, Ruby of protection |
Dragon Quest Tact
Restless armour appears as a C-rank monster of the Inorganic family. It can be recruited from Chapter 11, Episode 1: Cosgrove's Breakdown and Chapter 12, Episode 2: Should We Be Grateful? and it can participate in the Battle Roads of the Golem, Kon the Knight, and Gyldenbritches as a party member.
| ||||||||||||||||||||||||||||||||||||||||||||||||||||||||||||||||||||||||||||||||||||||||





Dragon Quest Treasures
Restless armour Bestiary number: #29 
| ||||||||||||||||||||||||||||||||||||||||||||||||||||||||||||||||||||||||||||||||||||||||||||


Gallery
-
 Famicom art.
 -

-

-
 Leaving.
 -
 A Restless armour in X.
 -
 XI polygon model.
 -
 A Vicious restless armour.
 -
 Monster Battle Road Victory cut-in.
 -

-
-

-
 Slime MoriMori Dragon Quest.
 -
 Fort Knight tank in Rocket Slime.
 -
 DQM1·2 sprite
 -
 Caravan Heart sprite.
 -
 Joker model.
 -
 LINE sticker
 -
 Appearance in Stars.
 -

-
 Rivals card.
 -
 A Restless armour enjoying the Arena fight with a Healslime, Magus, Ursa minor, and a King bubble slime
 -
-
DQ Trading Card Game card.


Similar species
- Pages with broken file links
- Stubs
- Dragon Quest III enemies
- Dragon Quest IV enemies
- Dragon Quest V enemies
- Dragon Quest VIII enemies
- Dragon Quest IX enemies
- Dragon Quest XI enemies
- Torneko: The Last Hope enemies
- Young Yangus and the Mysterious Dungeon enemies
- Dragon Quest Monster Battle Road Victory enemies
- Dragon Quest Monsters enemies
- Dragon Quest Monsters 2 enemies
- Dragon Quest Monsters: Caravan Heart enemies
- Dragon Quest Monsters: Joker enemies
- Dragon Quest Monsters: Joker 2 enemies
- Dragon Quest Monsters: Joker 2 Pro enemies
- Dragon Quest Monsters: Joker 3 enemies
- Dragon Quest Monsters: Terry's Wonderland 3D enemies
- Dragon Quest Monsters 2: Iru and Luca's Marvelous Mysterious Key enemies
- Dragon Quest Swords enemies
- Dragon Quest Heroes enemies
- Dragon Quest Heroes II enemies
- Dragon Quest Monsters: Super Light enemies
- Dragon Quest of the Stars enemies
- Dragon Quest Rivals enemies
- Dragon Quest Walk enemies
- Dragon Quest Tact monsters
- Dragon Quest Keshi Keshi enemies