Sir Mervyn: Difference between revisions
mNo edit summary |
m Text replacement - "{{Hero}}" to "{{HeroesNav}}" |
||
| (18 intermediate revisions by 8 users not shown) | |||
| Line 1: | Line 1: | ||
:''A warrior that fought alongside God in the age of the Demon Lord, when today's peace was but a distant dream. The results of that battle, and Melvin's whereabouts thereafter, remain a mystery to this very day. He would surely make a worthy traveling companion if you manage to make his acquaintance.'' | :''A warrior that fought alongside God in the age of the Demon Lord, when today's peace was but a distant dream. The results of that battle, and Melvin's whereabouts thereafter, remain a mystery to this very day. He would surely make a worthy traveling companion if you manage to make his acquaintance.'' | ||
::''--Description from the | ::''--Description from the {{Dragon Quest VII}} {{PSX}} instructional manual.'' | ||
{{quote|style=1|quote='''''Fie upon't! We cannot allow the fiend to have his wicked way with our world any longer! Come, Hero! Gird up thy loins, and let us beard the beast once more!'''''|source=Sir Mervyn|console={{3DS}}|align=center|bgcolor=99ff33}} | {{quote|style=1|quote='''''Fie upon't! We cannot allow the fiend to have his wicked way with our world any longer! Come, Hero! Gird up thy loins, and let us beard the beast once more!'''''|source=Sir Mervyn|console={{3DS}}|align=center|bgcolor=99ff33}} | ||
{{Character | {{Character | ||
|Name=Mervyn | |Name=Mervyn | ||
|Game={{ | |Game={{Dragon Quest VII}}<br>''[[Dragon Quest VII Reimagined]]'' | ||
|Image=[[ | |Image=[[File:DQVIIR Mervyn.png|center|175px]] | ||
|Sprite=[[Image:Dq7 melvin-sprite.gif]][[File:Sir Mervyn copy sprite.png]] | |Sprite=[[Image:Dq7 melvin-sprite.gif]][[File:Sir Mervyn copy sprite.png]] | ||
|Japanese name=メルビン | |Japanese name=メルビン | ||
| Line 18: | Line 18: | ||
|}} | |}} | ||
'''Sir Mervyn''' is a character in the {{DQSeries}} that appears as a playable party member in {{DQ7}}. He is an elderly paladin who aided [[ | '''Sir Mervyn''' is a character in the {{DQSeries}} that appears as a playable party member in {{DQ7}}. He is an elderly paladin who aided [[Numen|the Almighty]] in the fight against [[Orgodemir]]. However, before the final battle began, the Almighty sealed him away into the Hero Stone (or, as it came to be called, the Sizzling Stone) and he was whisked away until he was needed again. | ||
==Appearance and personality== | ==Appearance and personality== | ||
Mervyn is wrapped in chain mail from head to toe, wears red leather boots and gloves, and a sword belt wrapped around his waist. He also wears the tunic similar to the other members of the [[Holy Order of the Almighty]]. He sports a bushy white mustache. In the 3DS | Mervyn is wrapped in chain mail from head to toe, wears red leather boots and gloves, and a sword belt wrapped around his waist. He also wears the tunic similar to the other members of the [[Holy Order of the Almighty]]. He sports a bushy white mustache. In the {{3DS}} Version, Sir Mervyn is noticeably quite taller than the rest of the party. | ||
Mervyn is quite polite in conversation. He uses very formal diction, including archaic words such as ''thou'' and ''prithee''. He is very courteous to his comrades. For example, he calls the Hero ''Master Hero'' and Maribel ''Miss Maribel''. | Mervyn is quite polite in conversation. He uses very formal diction, including archaic words such as ''thou'' and ''prithee''. He is very courteous to his comrades. For example, he calls the {{Hero 7}} ''Master Hero'' and Maribel ''Miss {{Maribel}}''. | ||
Mervyn has a strong sense of duty which prevents him from walking away when someone else is in need, such as in the case of [[Nottagen]]. This is also coupled with his potent adherence to justice and intense hatred of the Demon King's machinations. He also has pride in his distinction as one of the Holy Order of the Almighty. Mervyn, so used to the fighting he endured, is fascinated by the present world and its relative peacefulness. He takes a keen interest in exploring past worlds and righting the wrongs of the past. Mervyn is also slightly perverted, demonstrated when he wishes to see [[Aishe]] dancing. He, at least, has the decency to apologize for this. | Mervyn has a strong sense of duty which prevents him from walking away when someone else is in need, such as in the case of [[Nottagen]]. This is also coupled with his potent adherence to justice and intense hatred of the Demon King's machinations. He also has pride in his distinction as one of the Holy Order of the Almighty. Mervyn, so used to the fighting he endured, is fascinated by the present world and its relative peacefulness. He takes a keen interest in exploring past worlds and righting the wrongs of the past. Mervyn is also slightly perverted, demonstrated when he wishes to see [[Aishe]] dancing. He, at least, has the decency to apologize for this. | ||
In the {{3DS}} remake, if the player decides to look in a mirror while Sir Mervyn is the first character in the party line-up, he will agonize over his wrinkles, marvel over the modernity of mirrors, ponder if he should try out a bunny suit to distract from his less youthful features, comment that he is becoming more manly by day, see the glint in his eye reflected in the glass, discover another white hair, say that the wrinkles in one's face tell the story of their life, lament that he might have been a beloved hero if his nose had been straighter, sigh at his reflection, express happiness that his eyes haven't lost their sparkle, and sneeze on the mirror. | In the {{3DS}} remake, if the player decides to look in a mirror while Sir Mervyn is the first character in the party line-up, he will agonize over his wrinkles, marvel over the modernity of mirrors, ponder if he should try out a bunny suit to distract from his less youthful features, comment that he is becoming more manly by day, see the glint in his eye reflected in the glass, discover another white hair, say that the wrinkles in one's face tell the story of their life, lament that he might have been a beloved hero if his nose had been straighter, sigh at his reflection, express happiness that his eyes haven't lost their sparkle, and sneeze on the mirror. | ||
{{clear}} | {{clear}} | ||
==Appearances== | ==Appearances== | ||
==={{DQ7}}=== | ==={{DQ7}}=== | ||
| Line 38: | Line 40: | ||
Bulgio knew that the Sizzling Stone was actually the Hero Stone, and wanted to revive Mervyn to be his servant. To do so, he had to climb the World's Tallest Tower and place the Sizzling Stone on the altar. Doing so would release Mervyn from the seal. | Bulgio knew that the Sizzling Stone was actually the Hero Stone, and wanted to revive Mervyn to be his servant. To do so, he had to climb the World's Tallest Tower and place the Sizzling Stone on the altar. Doing so would release Mervyn from the seal. | ||
After Bulgio and the party release Mervyn from the Hero Stone, he thanks them for doing so. Bulgio expresses some disappointment at Mervyn, who he expected to be a muscular, refined man---or even a beautiful woman. Bulgio allows Sir Mervyn to go with | After Bulgio and the party release Mervyn from the Hero Stone, he thanks them for doing so. Bulgio expresses some disappointment at Mervyn, who he expected to be a muscular, refined man---or even a beautiful woman. Bulgio allows Sir Mervyn to go with the {{Hero 7}} and his party. Mervyn expresses his wishes to find out what happened to the world after the battle between the Almighty and the Demon King. | ||
After the part defeats the Demon Lord in the past, they set themselves on reviving [[ | After the part defeats the Demon Lord in the past, they set themselves on reviving [[Numen|the Almighty]]. With the help of the [[Roamers]] and [[Florin]], they are successful in doing so. He thanks the party and the Roamers for his revival and promises that the world will enter a new era of peace. | ||
Months pass by as Mervyn works by God's side in the new [[ | Months pass by as Mervyn works by God's side in the new [[Cathedral of Light]], created next to [[Estard]]. However, Mervyn notices a change in God. He sees that God is sealing away worlds that are steeped in evil. Being suspicious, he asks God why he is doing this and is instantly branded a traitor. Mervyn escapes the Crystal Palace and makes it to [[Buccanham]]. There, he uses MindSpeak, a telekinetic ability that allows a person to reach another and communicate with them mentally, to tell the Hero and the party what he uncovered at the Crystal Palace. Mervyn explains that God has sealed all of the worlds that he deemed evil and [[Estard]] was one of them. He asks them to try and uncover the four elemental spirits but they tell him that they are unable to go anywhere. Mervyn realizes that in order for them to continue on their quest, he must find the Pilot Fire in Coastal. By himself, he makes his way to [[The Beacon]] where the Guiding Light is burning. He mentally sends them the Guiding Light so the party can find the elemental spirits. | ||
After Estard and all of the lands are unsealed, Mervyn inexplicably returns, giving the player the option of putting him in the final party against the Demon Lord. | After Estard and all of the lands are unsealed, Mervyn inexplicably returns, giving the player the option of putting him in the final party against the Demon Lord. | ||
| Line 48: | Line 50: | ||
{{spoiler|end}} | {{spoiler|end}} | ||
{{clear}} | {{clear}} | ||
====Base stats==== | |||
{| style="width:65%; height:100px; text-align:center" border="1" | |||
|-<---!Headings are up first.!---> style="font-weight:bold; background:#A3AB47" | |||
| Attribute || Starting Stats || Maximum Stats | |||
|- style="font-weight:normal" | |||
| Level || 19 || 99 | |||
|- | |||
| {{HP}} || 176 || 820 | |||
|- | |||
| {{MP}} || 97 || 880 | |||
|- | |||
| {{Strength}} || 45 || 370 | |||
|- | |||
| {{Agility}} || 43 || 165 | |||
|- | |||
| {{Resilience}} || 30 || 230 | |||
|- | |||
| {{Wisdom}} || 80 || 500 | |||
|- | |||
| {{Style}} || 24 || 95 | |||
|- | |||
| Initial gear ||colspan=2|[[Steel broadsword]], [[Chain mail]], [[Bronze shield]], [[Iron helmet]] | |||
|} | |||
{{clear}} | |||
====Spells and skills==== | ====Spells and skills==== | ||
Aside from vocation abilities, Mervyn learns a few spells and skills on his own: | Aside from vocation abilities, Mervyn learns a few spells and skills on his own: | ||
| Line 83: | Line 111: | ||
|0 | |0 | ||
|Self | |Self | ||
|Takes all of the attacks from enemies for a turn. Attacks that would have hit the party will hit the | |Takes all of the attacks from enemies for a turn. Attacks that would have hit the party will hit the defendee repeatedly | ||
|No | |No | ||
|- | |- | ||
| Line 122: | Line 150: | ||
|} | |} | ||
{{clear}} | {{clear}} | ||
==== | |||
====Equipment==== | |||
{{VersionTabs|Weapons|{{CharacterEquipmentList|header|title=Dragon Quest VII|subtitle=All|equipmentType=Weapon}} | {{VersionTabs|Weapons|{{CharacterEquipmentList|header|title=Dragon Quest VII|subtitle=All|equipmentType=Weapon}} | ||
{{CharacterEquipmentList|entry|item=[[Poison needle]]|statModifier=Attack+1}} | {{CharacterEquipmentList|entry|item=[[Poison needle]]|statModifier=Attack+1}} | ||
{{CharacterEquipmentList|entry|item=[[Poison needle|Poison needle plus]]|statModifier=Attack+1}} | {{CharacterEquipmentList|entry|item=[[Poison needle|Poison needle plus]]‡|statModifier=Attack+1}} | ||
{{CharacterEquipmentList|entry|item=[[Cypress stick]]|statModifier=Attack+2}} | {{CharacterEquipmentList|entry|item=[[Cypress stick]]|statModifier=Attack+2}} | ||
{{CharacterEquipmentList|entry|item=[[Bamboo spear]]|statModifier=Attack+5}} | {{CharacterEquipmentList|entry|item=[[Bamboo spear]]|statModifier=Attack+5}} | ||
| Line 160: | Line 166: | ||
{{CharacterEquipmentList|entry|item=[[Poison moth knife]]|statModifier=Attack+23}} | {{CharacterEquipmentList|entry|item=[[Poison moth knife]]|statModifier=Attack+23}} | ||
{{CharacterEquipmentList|entry|item=[[Chain sickle]]|statModifier=Attack+27}} | {{CharacterEquipmentList|entry|item=[[Chain sickle]]|statModifier=Attack+27}} | ||
{{CharacterEquipmentList|entry|item=[[Shepherd's crook]]|statModifier=Attack+27}} | {{CharacterEquipmentList|entry|item=[[Shepherd's crook]]‡|statModifier=Attack+27}} | ||
{{CharacterEquipmentList|entry|item=[[Lightning staff]]|statModifier=Attack+28}} | {{CharacterEquipmentList|entry|item=[[Lightning staff]]|statModifier=Attack+28}} | ||
{{CharacterEquipmentList|entry|item=[[Slime stick]]|statModifier=Attack+28}} | {{CharacterEquipmentList|entry|item=[[Slime stick]]‡|statModifier=Attack+28}} | ||
{{CharacterEquipmentList|entry|item=[[Snooze stick]]|statModifier=Attack+32}} | {{CharacterEquipmentList|entry|item=[[Snooze stick]]|statModifier=Attack+32}} | ||
{{CharacterEquipmentList|entry|item=[[Chain whip]]|statModifier=Attack+33}} | {{CharacterEquipmentList|entry|item=[[Chain whip]]|statModifier=Attack+33}} | ||
| Line 173: | Line 179: | ||
{{CharacterEquipmentList|entry|item=[[Cautery sword]]|statModifier=Attack+42}} | {{CharacterEquipmentList|entry|item=[[Cautery sword]]|statModifier=Attack+42}} | ||
{{CharacterEquipmentList|entry|item=[[Morning star]]|statModifier=Attack+43}} | {{CharacterEquipmentList|entry|item=[[Morning star]]|statModifier=Attack+43}} | ||
{{CharacterEquipmentList|entry|item=[[Frying pan]]|statModifier=Attack+44}} | {{CharacterEquipmentList|entry|item=[[Frying pan]]‡|statModifier=Attack+44}} | ||
{{CharacterEquipmentList|entry|item=[[Sage's staff]]|statModifier=Attack+50}} | {{CharacterEquipmentList|entry|item=[[Sage's staff]]|statModifier=Attack+50}} | ||
{{CharacterEquipmentList|entry|item=[[Dragontail whip]]|statModifier=Attack+52}} | {{CharacterEquipmentList|entry|item=[[Dragontail whip]]|statModifier=Attack+52}} | ||
| Line 183: | Line 189: | ||
{{CharacterEquipmentList|entry|item=[[Staff of resurrection]]|statModifier=Attack+66}} | {{CharacterEquipmentList|entry|item=[[Staff of resurrection]]|statModifier=Attack+66}} | ||
{{CharacterEquipmentList|entry|item=[[Watermaul wand]]|statModifier=Attack+74}} | {{CharacterEquipmentList|entry|item=[[Watermaul wand]]|statModifier=Attack+74}} | ||
{{CharacterEquipmentList|entry|item=[[Zombiesbane]]|statModifier=Attack+75}} | {{CharacterEquipmentList|entry|item=[[Zombiesbane (Weapon) |Zombiesbane]]|statModifier=Attack+75}} | ||
{{CharacterEquipmentList|entry|item=[[Staff of resurrection|Staff of re-surrection]]|statModifier=Attack+79}} | {{CharacterEquipmentList|entry|item=[[Staff of resurrection|Staff of re-surrection]]‡|statModifier=Attack+79}} | ||
{{CharacterEquipmentList|entry|item=[[Staff of | {{CharacterEquipmentList|entry|item=[[Staff of Rain]]‡|statModifier=Attack+88}} | ||
{{CharacterEquipmentList|entry|item= | {{CharacterEquipmentList|entry|item={{Sword of the Roamers}}|statModifier=Attack+90}} | ||
{{CharacterEquipmentList|entry|item=[[Sunderbolt blade]]|statModifier=Attack+95}} | {{CharacterEquipmentList|entry|item=[[Sunderbolt blade]]|statModifier=Attack+95}} | ||
{{CharacterEquipmentList|entry|item=[[Demon spear]]|statModifier=Attack+99}} | {{CharacterEquipmentList|entry|item=[[Demon spear]]|statModifier=Attack+99}} | ||
| Line 192: | Line 198: | ||
{{CharacterEquipmentList|entry|item=[[Saviour staff]]|statModifier=Attack+103}} | {{CharacterEquipmentList|entry|item=[[Saviour staff]]|statModifier=Attack+103}} | ||
{{CharacterEquipmentList|entry|item=[[Metal king sword]]|statModifier=Attack+130}} | {{CharacterEquipmentList|entry|item=[[Metal king sword]]|statModifier=Attack+130}} | ||
{{CharacterEquipmentList|entry|item= | {{CharacterEquipmentList|entry|item={{Okeanos Sword}}|statModifier=Attack+140}} | ||
{{CharacterEquipmentList|entry|item=[[Gringham whip]]|statModifier=Attack+145}} | {{CharacterEquipmentList|entry|item=[[Gringham whip]]|statModifier=Attack+145}} | ||
{{CharacterEquipmentList|note|text=}} | {{CharacterEquipmentList|note|text=}} | ||
| Line 205: | Line 211: | ||
{{CharacterEquipmentList|entry|item=[[Fur hood]]|statModifier=Defense+11}} | {{CharacterEquipmentList|entry|item=[[Fur hood]]|statModifier=Defense+11}} | ||
{{CharacterEquipmentList|entry|item=[[Turban]]|statModifier=Defense+12}} | {{CharacterEquipmentList|entry|item=[[Turban]]|statModifier=Defense+12}} | ||
{{CharacterEquipmentList|entry|item=[[Mad cap|Raving mad cap]]|statModifier=Defense+13}} | {{CharacterEquipmentList|entry|item=[[Mad cap|Raving mad cap]]‡|statModifier=Defense+13}} | ||
{{CharacterEquipmentList|entry|item=[[Iron helmet]]|statModifier=Defense+16}} | {{CharacterEquipmentList|entry|item=[[Iron helmet]]|statModifier=Defense+16}} | ||
{{CharacterEquipmentList|entry|item=[[Top hat]]|statModifier=Defense+17}} | {{CharacterEquipmentList|entry|item=[[Top hat]]|statModifier=Defense+17}} | ||
| Line 215: | Line 221: | ||
{{CharacterEquipmentList|entry|item=[[Happy hat]]|statModifier=Defense+37}} | {{CharacterEquipmentList|entry|item=[[Happy hat]]|statModifier=Defense+37}} | ||
{{CharacterEquipmentList|entry|item=[[Thinking cap]]|statModifier=Defense+37}} | {{CharacterEquipmentList|entry|item=[[Thinking cap]]|statModifier=Defense+37}} | ||
{{CharacterEquipmentList|entry|item=[[Sun crown]]|statModifier=Defense+52}} | {{CharacterEquipmentList|entry|item=[[Sun crown]]‡|statModifier=Defense+52}} | ||
{{CharacterEquipmentList|entry|item=[[Metal king helm]]|statModifier=Defense+60}} | {{CharacterEquipmentList|entry|item=[[Metal king helm]]|statModifier=Defense+60}} | ||
{{CharacterEquipmentList|entry|item=[[Mask of Implacability]]|statModifier=Defense+255}} | {{CharacterEquipmentList|entry|item=[[Mask of Implacability]]|statModifier=Defense+255}} | ||
| Line 235: | Line 241: | ||
{{CharacterEquipmentList|entry|item=[[Cloak of evasion]]|statModifier=Defense+28}} | {{CharacterEquipmentList|entry|item=[[Cloak of evasion]]|statModifier=Defense+28}} | ||
{{CharacterEquipmentList|entry|item=[[Garish garb]]|statModifier=Defense+28}} | {{CharacterEquipmentList|entry|item=[[Garish garb]]|statModifier=Defense+28}} | ||
{{CharacterEquipmentList|entry|item=[[ | {{CharacterEquipmentList|entry|item=[[Magic vestment]]|statModifier=Defense+30}} | ||
{{CharacterEquipmentList|entry|item=[[Captain's coat]]|statModifier=Defense+32}} | {{CharacterEquipmentList|entry|item=[[Captain's coat]]|statModifier=Defense+32}} | ||
{{CharacterEquipmentList|entry|item=[[Windcheater]]|statModifier=Defense+33}} | {{CharacterEquipmentList|entry|item=[[Windcheater]]‡|statModifier=Defense+33}} | ||
{{CharacterEquipmentList|entry|item=[[Legerdemantle]]|statModifier=Defense+37}} | {{CharacterEquipmentList|entry|item=[[Legerdemantle]]|statModifier=Defense+37}} | ||
{{CharacterEquipmentList|entry|item=[[Cirrus_gear#Cirrus_surplice|Cirrus surplice]]|statModifier=Defense+38}} | {{CharacterEquipmentList|entry|item=[[Cirrus_gear#Cirrus_surplice|Cirrus surplice]]|statModifier=Defense+38}} | ||
| Line 243: | Line 249: | ||
{{CharacterEquipmentList|entry|item=[[Smart suit]]|statModifier=Defense+40}} | {{CharacterEquipmentList|entry|item=[[Smart suit]]|statModifier=Defense+40}} | ||
{{CharacterEquipmentList|entry|item=[[Magic armour]]|statModifier=Defense+47}} | {{CharacterEquipmentList|entry|item=[[Magic armour]]|statModifier=Defense+47}} | ||
{{CharacterEquipmentList|entry|item=[[Glitzy glombolero]]|statModifier=Defense+50}} | {{CharacterEquipmentList|entry|item=[[Glombolero|Glitzy glombolero]]|statModifier=Defense+50}} | ||
{{CharacterEquipmentList|entry|item=[[Heavy armour]]|statModifier=Defense+50}} | {{CharacterEquipmentList|entry|item=[[Heavy armour]]|statModifier=Defense+50}} | ||
{{CharacterEquipmentList|entry|item=[[Angel's robe]]|statModifier=Defense+55}} | {{CharacterEquipmentList|entry|item=[[Angel's robe]]|statModifier=Defense+55}} | ||
| Line 251: | Line 257: | ||
{{CharacterEquipmentList|entry|item=[[Sacred armour]]|statModifier=Defense+75}} | {{CharacterEquipmentList|entry|item=[[Sacred armour]]|statModifier=Defense+75}} | ||
{{CharacterEquipmentList|entry|item=[[Dark robe]]|statModifier=Defense+78}} | {{CharacterEquipmentList|entry|item=[[Dark robe]]|statModifier=Defense+78}} | ||
{{CharacterEquipmentList|entry|item=[[Sacreder armour]]|statModifier=Defense+88}} | {{CharacterEquipmentList|entry|item=[[Sacred armour|Sacreder armour]]‡|statModifier=Defense+88}} | ||
{{CharacterEquipmentList|entry|item=[[Pallium regale]]|statModifier=Defense+90}} | {{CharacterEquipmentList|entry|item=[[Pallium regale]]|statModifier=Defense+90}} | ||
{{CharacterEquipmentList|entry|item=[[Dragon robe]]|statModifier=Defense+95}} | {{CharacterEquipmentList|entry|item=[[Dragon robe]]|statModifier=Defense+95}} | ||
{{CharacterEquipmentList|entry|item=[[Metal king armour]]|statModifier=Defense+115}} | {{CharacterEquipmentList|entry|item=[[Metal king armour]]|statModifier=Defense+115}} | ||
{{CharacterEquipmentList|entry|item= | {{CharacterEquipmentList|entry|item={{Gaia Armour}}|statModifier=Defense+125}} | ||
{{CharacterEquipmentList|note|text=}} | {{CharacterEquipmentList|note|text=}} | ||
{{CharacterEquipmentList|footer}}|Shields| | {{CharacterEquipmentList|footer}}|Shields| | ||
| Line 266: | Line 272: | ||
{{CharacterEquipmentList|entry|item=[[Slime shield]]|statModifier=Defense+17}} | {{CharacterEquipmentList|entry|item=[[Slime shield]]|statModifier=Defense+17}} | ||
{{CharacterEquipmentList|entry|item=[[Magic shield]]|statModifier=Defense+18}} | {{CharacterEquipmentList|entry|item=[[Magic shield]]|statModifier=Defense+18}} | ||
{{CharacterEquipmentList|entry|item=[[Encyclopedia Titanica]]|statModifier=Defense+20}} | {{CharacterEquipmentList|entry|item=[[Encyclopedia Titanica]]‡|statModifier=Defense+20}} | ||
{{CharacterEquipmentList|entry|item=[[Pot lid|Premium pot lid]]|statModifier=Defense+35}} | {{CharacterEquipmentList|entry|item=[[Pot lid|Premium pot lid]]‡|statModifier=Defense+35}} | ||
{{CharacterEquipmentList|entry|item=[[Silver shield]]|statModifier=Defense+50}} | {{CharacterEquipmentList|entry|item=[[Silver shield]]|statModifier=Defense+50}} | ||
{{CharacterEquipmentList|entry|item= | {{CharacterEquipmentList|entry|item={{Aeras Shield}}|statModifier=Defense+60}} | ||
{{CharacterEquipmentList|entry|item=[[Shimmering shield]]|statModifier=Defense+65}} | {{CharacterEquipmentList|entry|item=[[Shimmering shield]]‡|statModifier=Defense+65}} | ||
{{CharacterEquipmentList|entry|item=[[Metal king shield]]|statModifier=Defense+70}} | {{CharacterEquipmentList|entry|item=[[Metal king shield]]|statModifier=Defense+70}} | ||
{{CharacterEquipmentList|note|text=}} | {{CharacterEquipmentList|note|text=}} | ||
{{CharacterEquipmentList|footer}}|Accessories| | {{CharacterEquipmentList|footer}}|Accessories| | ||
{{CharacterEquipmentList|header|title=Dragon Quest VII|subtitle=All|equipmentType=Accessories}} | {{CharacterEquipmentList|header|title=Dragon Quest VII|subtitle=All|equipmentType=Accessories}} | ||
{{CharacterEquipmentList|entry|item=[[ | {{CharacterEquipmentList|entry|item=[[Agility ring]]|statModifier=Agility +15}} | ||
{{CharacterEquipmentList|entry|item=[[Air Amulet]]|statModifier=Agility +50}} | |||
{{CharacterEquipmentList|entry|item=[[ | {{CharacterEquipmentList|entry|item=[[Bow tie]]|statModifier=Defense +2}} | ||
{{CharacterEquipmentList|entry|item=[[ | {{CharacterEquipmentList|entry|item=[[Bunny tail]]|statModifier=Style +2}} | ||
{{CharacterEquipmentList|entry|item=[[ | {{CharacterEquipmentList|entry|item=[[Earth Amulet]]|statModifier=Defense +20}} | ||
{{CharacterEquipmentList|entry|item=[[ | {{CharacterEquipmentList|entry|item=[[Elevating shoes]]|statModifier=Style +5}} | ||
{{CharacterEquipmentList|entry|item=[[ | {{CharacterEquipmentList|entry|item=Extra elevating shoes‡|statModifier=Style +15}} | ||
{{CharacterEquipmentList|entry|item= | {{CharacterEquipmentList|entry|item=[[Eye of Rubiss]]‡|statModifier=Style +25}} | ||
{{CharacterEquipmentList|entry|item=[[ | {{CharacterEquipmentList|entry|item=[[Fire Amulet]]|statModifier=Attack +25}} | ||
{{CharacterEquipmentList|entry|item=[[ | {{CharacterEquipmentList|entry|item=[[Goddess ring]]|statModifier=Wisdom +33}} | ||
{{CharacterEquipmentList|entry|item=[[ | {{CharacterEquipmentList|entry|item=[[Gold bracer]]|statModifier=Defense +5}} | ||
{{CharacterEquipmentList|entry|item=[[ | {{CharacterEquipmentList|entry|item=[[Gospel ring]]|statModifier=Defense +50}} | ||
{{CharacterEquipmentList|entry|item=[[ | {{CharacterEquipmentList|entry|item=[[Kamikazee bracer]]|statModifier=Defense +10}} | ||
{{CharacterEquipmentList|entry|item=[[ | {{CharacterEquipmentList|entry|item=[[Kerplunk bracer]]|statModifier=Defense +10}} | ||
{{CharacterEquipmentList|entry|item=[[ | {{CharacterEquipmentList|entry|item=[[Life ring]]|statModifier=Defense +5}} | ||
{{CharacterEquipmentList|entry|item=[[ | {{CharacterEquipmentList|entry|item=[[Lifesaving medal]]‡|statModifier=Style +8}} | ||
{{CharacterEquipmentList|entry|item=[[ | {{CharacterEquipmentList|entry|item=[[Lucky pendant]]‡|statModifier=Defense +5}} | ||
{{CharacterEquipmentList|entry|item=[[ | {{CharacterEquipmentList|entry|item=[[Mercury's bandana]]|statModifier=Agility +30}} | ||
{{CharacterEquipmentList|entry|item=[[Mercury's bandana]]|statModifier=Agility+30}} | {{CharacterEquipmentList|entry|item=[[Mermaid Moon]]|statModifier=Style +5}} | ||
{{CharacterEquipmentList|entry|item=[[ | {{CharacterEquipmentList|entry|item=[[Meteorite bracer]]|statModifier=Agility x2}} | ||
{{CharacterEquipmentList|entry|item=[[ | {{CharacterEquipmentList|entry|item=[[Mighty armlet]]|statModifier=Attack +15}} | ||
{{CharacterEquipmentList|entry|item=[[ | {{CharacterEquipmentList|entry|item=[[Prayer ring]]|statModifier=Defense +5}} | ||
{{CharacterEquipmentList|entry|item=[[ | {{CharacterEquipmentList|entry|item=[[Ruby of protection]]|statModifier=Defense +10}} | ||
{{CharacterEquipmentList|entry|item=[[ | {{CharacterEquipmentList|entry|item=[[Scholar's specs]]|statModifier=Wisdom +15}} | ||
{{CharacterEquipmentList|entry|item=[[Scholar's specs]]|statModifier=}} | {{CharacterEquipmentList|entry|item=[[Slime earrings]]|statModifier=Defense +1}} | ||
{{CharacterEquipmentList|entry|item=[[ | {{CharacterEquipmentList|entry|item=[[Snappy slippers]]‡|statModifier=Agility +25}} | ||
{{CharacterEquipmentList|entry|item=[[ | {{CharacterEquipmentList|entry|item=[[Soldier's Medal|Soldier's medal]]‡|statModifier=Style +8}} | ||
{{CharacterEquipmentList|entry|item=[[ | {{CharacterEquipmentList|entry|item=[[Strength ring]]|statModifier=Attack +7}} | ||
{{CharacterEquipmentList|entry|item=[[Trailblazing bandana]]|statModifier=Defense +5}} | |||
{{CharacterEquipmentList|entry|item=[[ | {{CharacterEquipmentList|entry|item=[[Water Amulet]]|statModifier=Defense +30}} | ||
{{CharacterEquipmentList|entry|item=[[ | {{CharacterEquipmentList|entry|item=[[Windbreaker]]‡|statModifier=Agility +50}} | ||
{{CharacterEquipmentList|entry|item=[[ | |||
{{CharacterEquipmentList|entry|item=[[ | |||
{{CharacterEquipmentList|footer}}}} | {{CharacterEquipmentList|footer}}}} | ||
* ‡3DS version only. | |||
{{clear}} | {{clear}} | ||
In the 3DS | ====Vocation strategy==== | ||
Sir Mervyn is a jack-of-all-trades who does well in any role in the party, particularly excelling in magic-based vocations due to his high MP growth. His main drawback is that he has the lowest Agility of the party, so it would be a good idea to give him accessories like the [[Agility ring]] or [[Mercury's bandana]] to make up for it. His equipment choices are very similar to a [[Priest]], since he can essentially equip all wands and robes, as well as some access to swords and heavy armor. Although he does join the party with quite a few useful abilities learned, he has no vocational experience whatsoever, so it is necessary to pay a visit to {{Alltrades Abbey 7}}. | |||
In the {{3DS}} Version, since Mervyn will likely join the party at a lower level than the other characters, it is a good idea to have Sir Mervyn grind some vocations in [[Traveller's Tablet|Slimetree Forest]] to get him up to speed with everyone else. | |||
==Gallery== | ==Gallery== | ||
<center><gallery> | <center><gallery> | ||
File:Mervyn thinking.png|Artwork of Melvin from ''Dragon Quest VII''. | |||
File:Mervyn preparing to draw.png | |||
File:Released From The Stone.png | |||
File:Mervyn battleready.png | |||
File:DQ VII PS1 Aishe, Sir Mervyn and Kiefer.jpg | |||
File:DQVII Mervyn and Hero.png|With the Hero | |||
File:VII cast sailing.jpg|Gazing into the horizon | |||
File:DQVII Coral Cave.jpg|Fighting in the [[Coral Cave]] | |||
File:Ruff and Mervyn.png|Keeping watch at night | |||
File:Maribel curtsey.png|Speaking to an Alltrades priest | |||
File:Sir Mervyn.png|3DS artwork | |||
File:Melvin3DS.png | |||
File:DQ7R Meryvn Costume.jpeg|Rab costume in ''Reimagined.'' | |||
File:DQR Mervyn.png|''[[Dragon Quest Rivals|Rivals]]'' artwork | |||
File:DQR Sir Mervyn 2.png | |||
File:DQT Sir Mervyn.png|''[[Dragon Quest Tact|Tact]]'' artwork'''.''' | |||
File:DQ Stars Android Mervyn 1.jpg|Appearance in {{Stars}}. | |||
File:DQ Stars Android Mervyn 2.jpg | |||
File:DQ Stars Android Mervyn 3.jpg | |||
File:DQ Stars Android Mervyn 4.jpg | |||
File:DQ Stars Android Mervyn 5.jpg | |||
File:DQ Stars Android Mervyn 6.jpg | |||
File:DQ Stars Android Mervyn 7.jpg | |||
File:DQ Stars Android Mervyn 8.jpg | |||
</gallery></center> | </gallery></center> | ||
{{clear}} | {{clear}} | ||
{{ | |||
{{ | {{HeroesNav}} | ||
{{DQVIINav}} | |||
[[Category:Party members]] | [[Category:Party members]] | ||
[[Category:Dragon Quest VII characters]] | [[Category:Dragon Quest VII characters]] | ||
[[Category:Dragon Quest of the Stars characters]] | |||
[[Category:Dragon Quest Rivals characters]] | |||
[[fr:Sieur Gauvain]] | |||
[[es:Sir Enio]] | |||
Latest revision as of 08:42, 5 April 2026
- A warrior that fought alongside God in the age of the Demon Lord, when today's peace was but a distant dream. The results of that battle, and Melvin's whereabouts thereafter, remain a mystery to this very day. He would surely make a worthy traveling companion if you manage to make his acquaintance.
- --Description from the Dragon Quest VII PSX instructional manual.
"Fie upon't! We cannot allow the fiend to have his wicked way with our world any longer! Come, Hero! Gird up thy loins, and let us beard the beast once more!"
—Sir Mervyn (3DS)
| Mervyn | |
| Dragon Quest VII Dragon Quest VII Reimagined | |
 | |
| Sprite(s) |  
|
| Japanese name | メルビン |
| Romaji | Merubin |
| Old localisation | Melvin |
| Title | Legendary Hero |
| Vocation | Adjustable |
| Race | Soldier of God |
| Age | 60s |
Sir Mervyn is a character in the Dragon Quest series that appears as a playable party member in Dragon Quest VII: Fragments of the Forgotten Past. He is an elderly paladin who aided the Almighty in the fight against Orgodemir. However, before the final battle began, the Almighty sealed him away into the Hero Stone (or, as it came to be called, the Sizzling Stone) and he was whisked away until he was needed again.
Appearance and personality[edit | edit source]
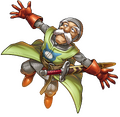
Mervyn is wrapped in chain mail from head to toe, wears red leather boots and gloves, and a sword belt wrapped around his waist. He also wears the tunic similar to the other members of the Holy Order of the Almighty. He sports a bushy white mustache. In the 3DS Version, Sir Mervyn is noticeably quite taller than the rest of the party.
Mervyn is quite polite in conversation. He uses very formal diction, including archaic words such as thou and prithee. He is very courteous to his comrades. For example, he calls the Hero Master Hero and Maribel Miss Maribel.
Mervyn has a strong sense of duty which prevents him from walking away when someone else is in need, such as in the case of Nottagen. This is also coupled with his potent adherence to justice and intense hatred of the Demon King's machinations. He also has pride in his distinction as one of the Holy Order of the Almighty. Mervyn, so used to the fighting he endured, is fascinated by the present world and its relative peacefulness. He takes a keen interest in exploring past worlds and righting the wrongs of the past. Mervyn is also slightly perverted, demonstrated when he wishes to see Aishe dancing. He, at least, has the decency to apologize for this.
In the 3DS remake, if the player decides to look in a mirror while Sir Mervyn is the first character in the party line-up, he will agonize over his wrinkles, marvel over the modernity of mirrors, ponder if he should try out a bunny suit to distract from his less youthful features, comment that he is becoming more manly by day, see the glint in his eye reflected in the glass, discover another white hair, say that the wrinkles in one's face tell the story of their life, lament that he might have been a beloved hero if his nose had been straighter, sigh at his reflection, express happiness that his eyes haven't lost their sparkle, and sneeze on the mirror.
Appearances[edit | edit source]
Dragon Quest VII: Fragments of the Forgotten Past[edit | edit source]
Base stats[edit | edit source]
| Attribute | Starting Stats | Maximum Stats |
| Level | 19 | 99 |
| HP | 176 | 820 |
| MP | 97 | 880 |
| Strength | 45 | 370 |
| Agility | 43 | 165 |
| Resilience | 30 | 230 |
| Wisdom | 80 | 500 |
| Style | 24 | 95 |
| Initial gear | Steel broadsword, Chain mail, Bronze shield, Iron helmet | |
Spells and skills[edit | edit source]
Aside from vocation abilities, Mervyn learns a few spells and skills on his own:
| Level | Skill/Spell | MP Required | Target | Info | Oomph |
| 19 | Bang | 5 | All Enemies | Causes an explosion that does around 20 HP damage to all enemies | No |
| 19 | Underpants Dance | 0 | One Group | A ridiculous dance that may cause an enemy group to laugh, stopping them from attacking for a turn | No |
| 19 | Poof | 1 | One Group | Banishes one group of enemies from battle. Party gains no experience points for expelled enemies | No |
| 19 | Forbearance | 0 | Self | Takes all of the attacks from enemies for a turn. Attacks that would have hit the party will hit the defendee repeatedly | No |
| 19 | Midheal | 4 | One Ally | Heals around 80 HP to one ally | No |
| 19 | Swoosh | 8 | One Group | Causes around 30 HP of wind damage to one group of enemies | No |
| 19 | Evac | 8 | Field | Allows the party to escape dungeons and caves | No |
| 19 | Zoom | 1 | Field | Allows the party to return to previously visited towns (Does not work in the past) (Does not work indoors) | No |
| 20 | Zing | 8 | One Ally | Has a 50 percent chance to revive the target with half their HP restored | No |
Equipment[edit | edit source]
| Dragon Quest VII (All) | |
|---|---|
| Helmet | Modifier(s) |
| Canny cap | Wisdom+30 |
| Leather hat | Defense+3 |
| Pointy hat | Defense+5 |
| Hardwood headwear | Defense+6 |
| Mad cap | Defense+8 |
| Iron pot | Defense+9 |
| Fur hood | Defense+11 |
| Turban | Defense+12 |
| Raving mad cap‡ | Defense+13 |
| Iron helmet | Defense+16 |
| Top hat | Defense+17 |
| Pirate's hat | Defense+19 |
| Hermes' hat | Defense+24 |
| Duplic hat | Defense+25 |
| Slime crown | Defense+31 |
| Mythril helm | Defense+32 |
| Happy hat | Defense+37 |
| Thinking cap | Defense+37 |
| Sun crown‡ | Defense+52 |
| Metal king helm | Defense+60 |
| Mask of Implacability | Defense+255 |
| Dragon Quest VII (All) | |
|---|---|
| Armor | Modifier(s) |
| Plain clothes | Defense+4 |
| Boxer shorts | Defense+5 |
| Wayfarer's clothes | Defense+7 |
| Silk tuxedo | Defense+10 |
| Leather armour | Defense+11 |
| Leather kilt | Defense+12 |
| Silk robe | Defense+13 |
| Scale armour | Defense+15 |
| Shell armour | Defense+18 |
| Chain mail | Defense+20 |
| Noble garb | Defense+21 |
| Iron cuirass | Defense+26 |
| Cloak of evasion | Defense+28 |
| Garish garb | Defense+28 |
| Magic vestment | Defense+30 |
| Captain's coat | Defense+32 |
| Windcheater‡ | Defense+33 |
| Legerdemantle | Defense+37 |
| Cirrus surplice | Defense+38 |
| Glombolero | Defense+40 |
| Smart suit | Defense+40 |
| Magic armour | Defense+47 |
| Glitzy glombolero | Defense+50 |
| Heavy armour | Defense+50 |
| Angel's robe | Defense+55 |
| Enchanted armour | Defense+55 |
| Flowing dress | Defense+65 |
| Slime armour | Defense+67 |
| Sacred armour | Defense+75 |
| Dark robe | Defense+78 |
| Sacreder armour‡ | Defense+88 |
| Pallium regale | Defense+90 |
| Dragon robe | Defense+95 |
| Metal king armour | Defense+115 |
| Gaia Armour | Defense+125 |
| Dragon Quest VII (All) | |
|---|---|
| Shields | Modifier(s) |
| Pot lid | Defense+2 |
| Leather shield | Defense+4 |
| Scale shield | Defense+7 |
| Bronze shield | Defense+11 |
| White shield | Defense+16 |
| Slime shield | Defense+17 |
| Magic shield | Defense+18 |
| Encyclopedia Titanica‡ | Defense+20 |
| Premium pot lid‡ | Defense+35 |
| Silver shield | Defense+50 |
| Aeras Shield | Defense+60 |
| Shimmering shield‡ | Defense+65 |
| Metal king shield | Defense+70 |
| Dragon Quest VII (All) | |
|---|---|
| Accessories | Modifier(s) |
| Agility ring | Agility +15 |
| Air Amulet | Agility +50 |
| Bow tie | Defense +2 |
| Bunny tail | Style +2 |
| Earth Amulet | Defense +20 |
| Elevating shoes | Style +5 |
| Extra elevating shoes‡ | Style +15 |
| Eye of Rubiss‡ | Style +25 |
| Fire Amulet | Attack +25 |
| Goddess ring | Wisdom +33 |
| Gold bracer | Defense +5 |
| Gospel ring | Defense +50 |
| Kamikazee bracer | Defense +10 |
| Kerplunk bracer | Defense +10 |
| Life ring | Defense +5 |
| Lifesaving medal‡ | Style +8 |
| Lucky pendant‡ | Defense +5 |
| Mercury's bandana | Agility +30 |
| Mermaid Moon | Style +5 |
| Meteorite bracer | Agility x2 |
| Mighty armlet | Attack +15 |
| Prayer ring | Defense +5 |
| Ruby of protection | Defense +10 |
| Scholar's specs | Wisdom +15 |
| Slime earrings | Defense +1 |
| Snappy slippers‡ | Agility +25 |
| Soldier's medal‡ | Style +8 |
| Strength ring | Attack +7 |
| Trailblazing bandana | Defense +5 |
| Water Amulet | Defense +30 |
| Windbreaker‡ | Agility +50 |
- ‡3DS version only.
Vocation strategy[edit | edit source]
Sir Mervyn is a jack-of-all-trades who does well in any role in the party, particularly excelling in magic-based vocations due to his high MP growth. His main drawback is that he has the lowest Agility of the party, so it would be a good idea to give him accessories like the Agility ring or Mercury's bandana to make up for it. His equipment choices are very similar to a Priest, since he can essentially equip all wands and robes, as well as some access to swords and heavy armor. Although he does join the party with quite a few useful abilities learned, he has no vocational experience whatsoever, so it is necessary to pay a visit to Alltrades Abbey.
In the 3DS Version, since Mervyn will likely join the party at a lower level than the other characters, it is a good idea to have Sir Mervyn grind some vocations in Slimetree Forest to get him up to speed with everyone else.
Gallery[edit | edit source]
-
 Artwork of Melvin from Dragon Quest VII.
 -

-

-

-

-
 With the Hero
 -
 Gazing into the horizon
 -
 Fighting in the Coral Cave
 -
 Keeping watch at night
 -
 Speaking to an Alltrades priest
 -
 3DS artwork
 -
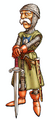
-
 Rab costume in Reimagined.
 -
 Rivals artwork
 -
-
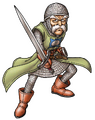 Tact artwork.
 -
 Appearance in Stars.
 -

-

-

-

-

-

-


